10 Pastel Street Snaps from Harajuku, Tokyo (Video)
Monday, January 4th, 2016


![]()
![]()
![]()
![]()
![]()
![]()
![]()
![]()


![]()
Monday, January 4th, 2016
![]()
Sunday, January 3rd, 2016
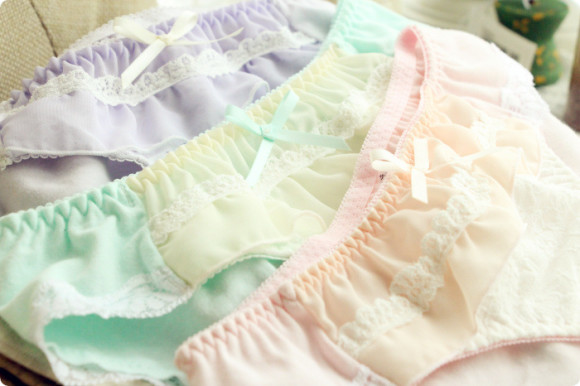
Yo, it doesn’t even matter that no one is seeing your underwear or whether it matches your coord or not. Wearing cute stuff under your clothes makes you feel so good!! So here are some simple, cozy, cotton panties that would be so super cute to wear under your favorite soft larme-kei coordinates. And anything else.
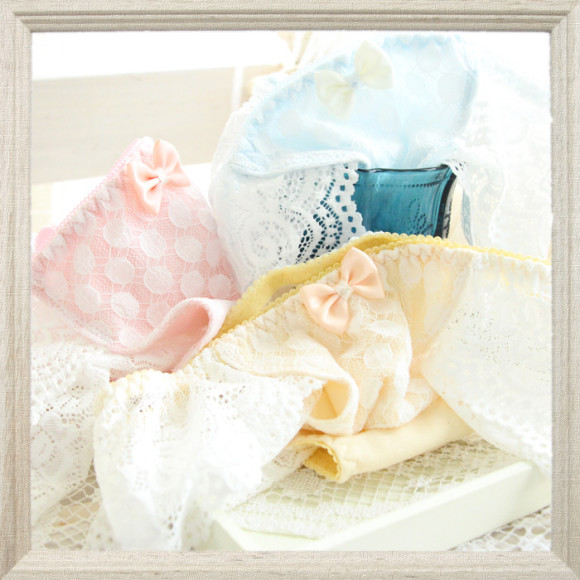
Most of my listings here today consist of sets of 5 panties,
whose colors are shipped at random!
The colors for this assortment could be a combination of soft yellow,
pink, and a teal-ish baby blue.
The white lace on the sides is my favorite!!
–
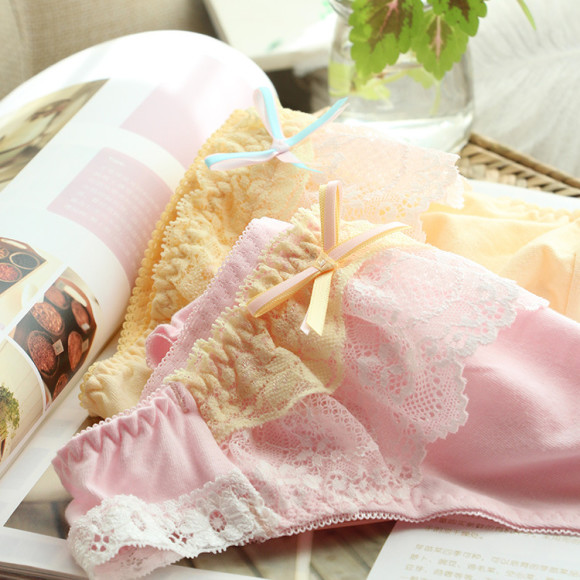
5-Piece Pink & Yellow Cotton & Lace Panties
These two designs are pink and yellow in contrasting colors!
Though they have lace ruffles on them, they are cotton all the way around
unlike the listing above.
–
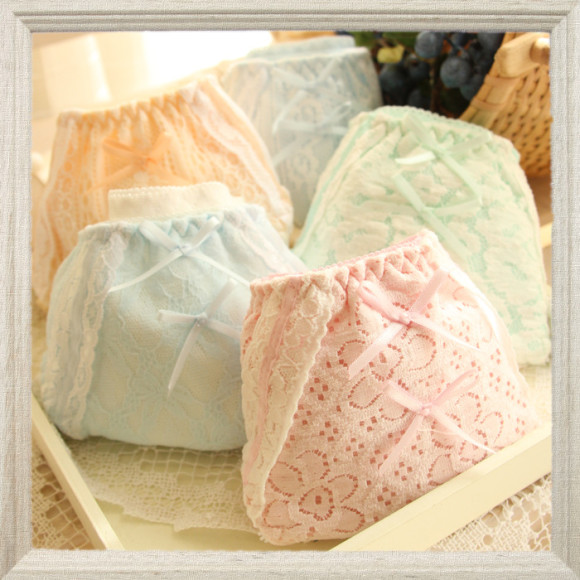
5-Piece Pastel Lace with Ribbon Bows Panties
A set of panties with a panel of lace at the front
(and the pattern is different for each color!)
and a couple of cute ribbon bows!!!
I like this set because it has a pretty minty green color selection!
–
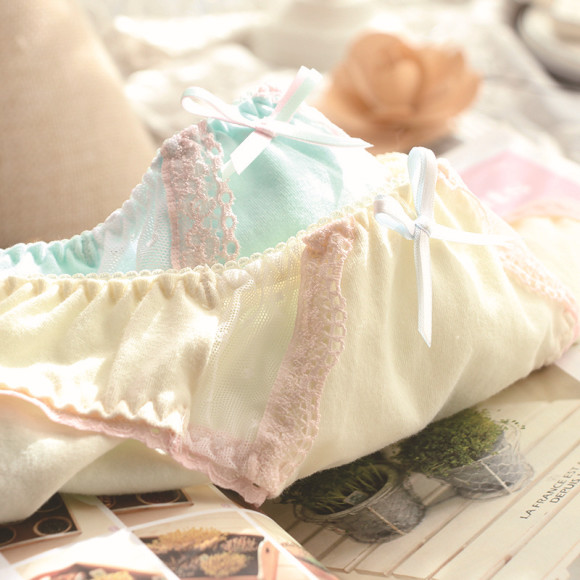
5-Pieces Blue & Yellow Mesh Cotton Panties Set
The colors in this set are a very sweet blue and buttery yellow!
They are mostly a solid color with just a little bit of lacy detail.
–
5-Piece Soft Pastel Cotton Panties Set
This selection has some contrasting ruffle at the front
and a really pretty lace edge!!
I like the lavender purple that’s available in this one, too!
![]()
Sunday, December 13th, 2015
A few of my very favorite Aliexpress sellers just updated with these cute pastel accessories, including fuzzy sleep socks, heart chokers, and a wallet! They may make just the nicest gift for a kawaii friend, or as a sweet indulgence for yourself. You’re allowed to buy gifts for yourself, absolutely!!
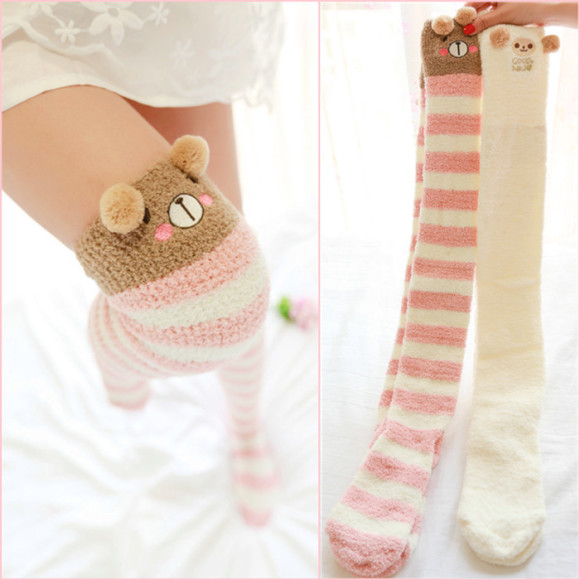
Moco Moco Thigh-High Roomwear Socks – Bear or Sheepie
Ahhhh it would be so hard to decide between the two of these!!
I love the pink stripes that the bear design has,
but omg cute fluffy sheepies are among my favorite animals!!!!
–
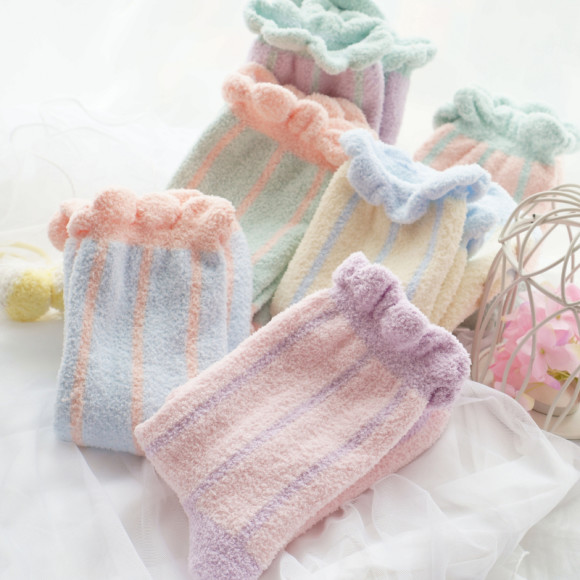
Pastel Moco Moco Scallop-Edge Sleep Socks
These are significantly shorter than the thigh-highs,
but they come in suuuuuuch cute, soft color combinations!
It’s hard to tell from how they’re ruffled in the above photo,
but when they are worn the edges are cutely scalloped.
–
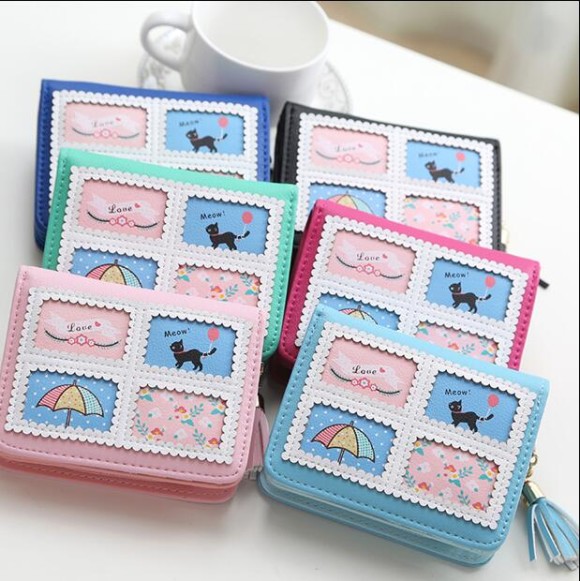
Pastel Scallop-Edge & Cute Illustration Wallet
Awww the cute little illustrations on this wallet are so sweet!
I love the scalloped edge framing them, and the tassel zipper pull is cool, too.
I always default to pink for anything like this,
but I really love that minty green color, too.
–
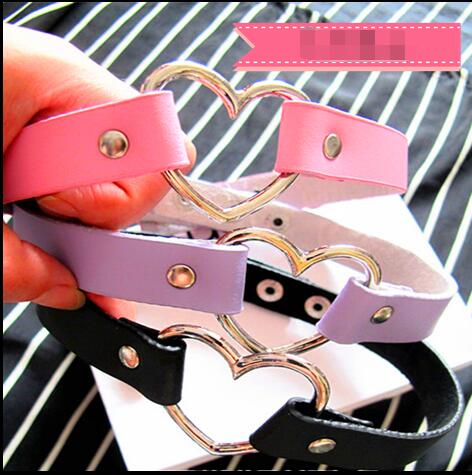
Pastel Grunge Heart-Ring Choker
These are pretty much a staple of all grungey kawaii coordinates at the moment.
I love that stuff like this is cutesy and pastel nowadays.
When I browsed Hot Topic for stuff like this as a schoolgoing lass,
they were only available in black or black-and-red.
–
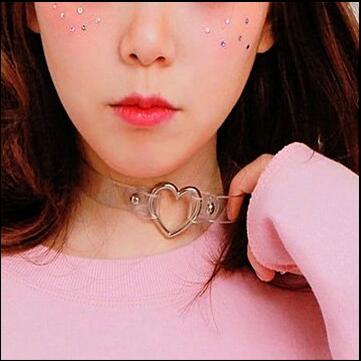
Pastel Grunge Transparent Heart-Ring Choker
Pretty much the same listing as the above, but the choker on this one is transparent!!
Well, really, I just liked the rhinestone makeup that the model is wearing, lol.
![]()
Wednesday, October 21st, 2015
Omg, look at how adorable and cozy these jackets and hoodies are!! These are really cute in a ‘neutral’ way. I think that the brand that produces most of this selection is a mori girl brand. But these are kind of cutely casual enough that they can be worn by in a casual gyaru or fairy kei coordinate.
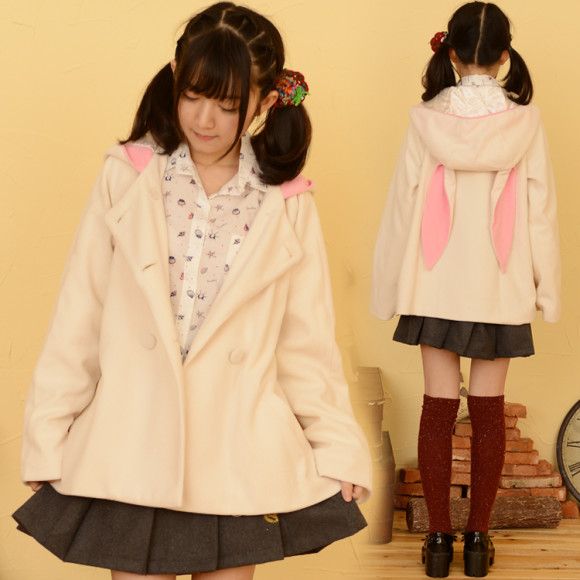
Cute Oversized Bunny Ear Hooded Coat
The biiig sleeves on this make it look extra cozy!
And OMG! My greatest weakness of all – BUNNY EARS!!
The ears on this coat are soooo big and long!
This coat comes in other colors than the beige here –
its pink and black variations have really cute ivory ears!
–
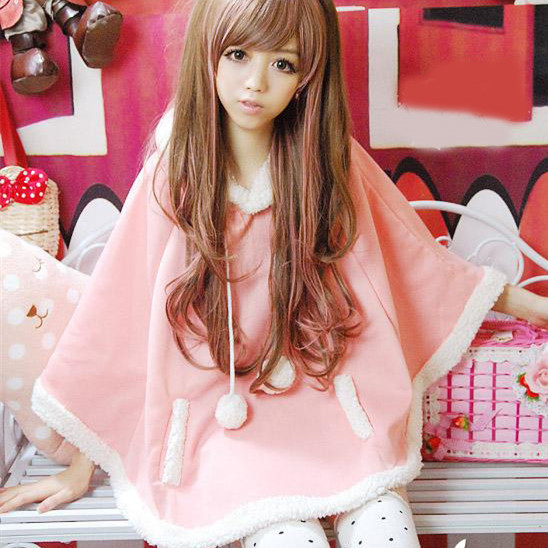
Cute Batwing Sleeve Fleece Poncho Cape
Capes like this are preeeetty much my favorite thing lately.
It’s like throwing a huge, cozy fleece blanket over your shoulders.
And you can wear them over your regular coat!
They are just an awesome additional layer of warmth.
And this super cute style with sherpa trim is available in NINE different colors!
–
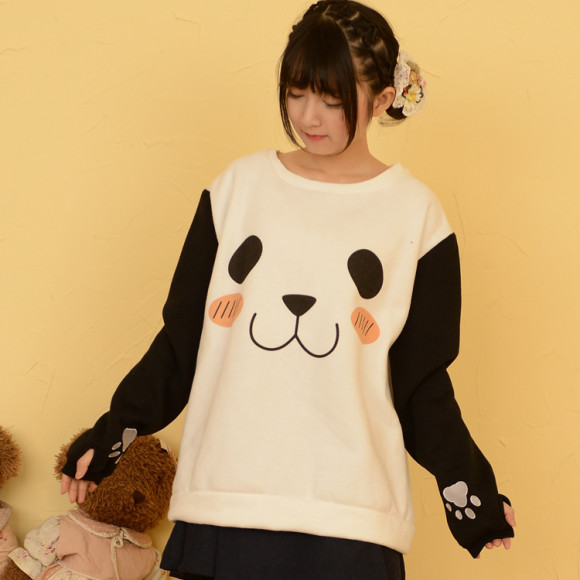
Cute Panda Face Sweater with Paw Sleeves
Omg panda face!!
And LOOK!! At the SLEEVES!!
They are long enough to go over your hands, with little thumb holes,
and there are really cute little paw prints on them!!!
AAAHH!!
–
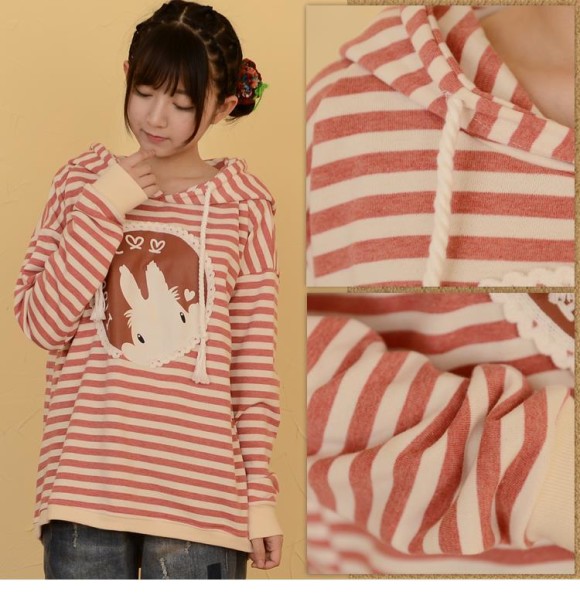
Sweet Bunny Long-Sleeved Hoodie
The precious bunny portrait in the center of this is soo cute!!
It has so many little hearts and hugs to share with you!!
This comes in three colors – there are also grey and navy stripes.
–
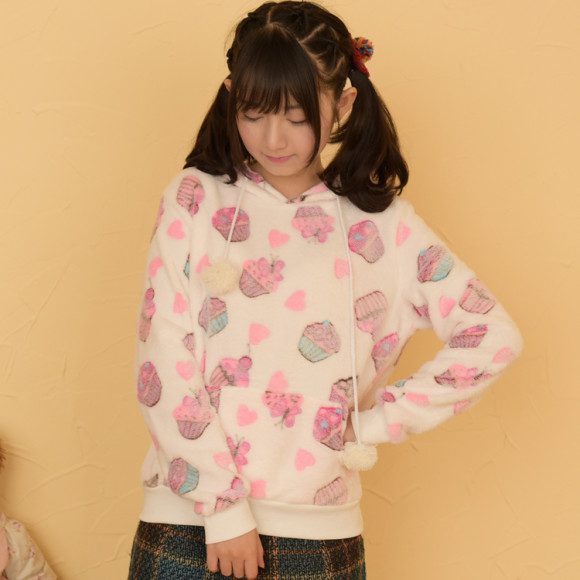
Sweet Pastel Print Micro Fleece Hoodie
This is for sure the most fairy kei-like item in my selection today!!
Okay, you really have to click through to check out all of the pics
for this one – there are 8 different styles, and they are all
different cute prints including cupcakes, bows, lipstick marks,
chibi elephants, hearts and strawberries!!
And the material is SOOO soft!!
![]()
Tuesday, October 13th, 2015
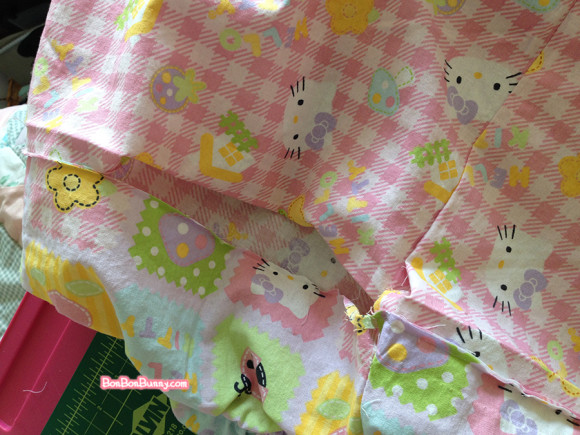
Hello friends!! ヾ(@°▽°@)ノ Today I will share how I made a very cute and pastel Hello Kitty skirt for fairy-kei!! It is very ruffly and cute!! I made some changes to it while I worked, so you will also see how I fix things on the fly so that I like them better~
There aren’t any pattern pieces needed for this – the pieces are all rectangles!
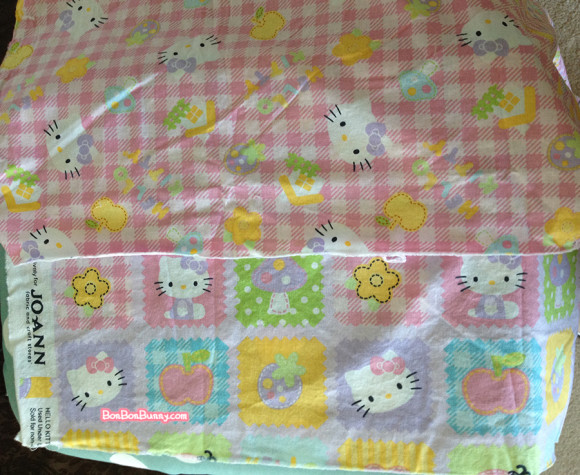
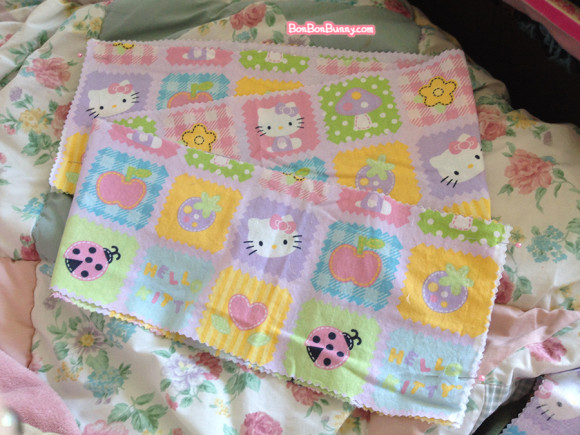
Here are my fabric choices –
some cute coordinating fabrics with Hello Kitty designs in pastel colors!
The pink gingham will be our ‘main’ fabric choice
while the squares will be contrast pieces
–
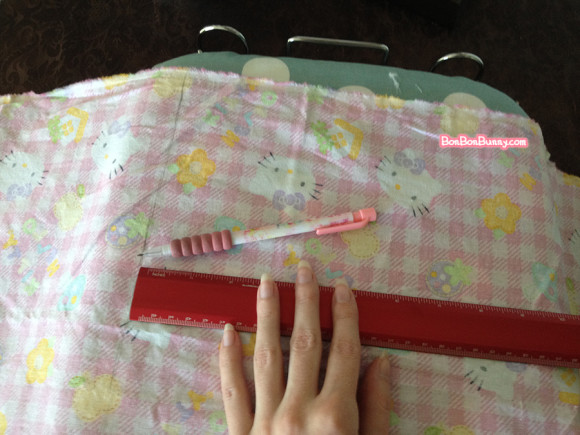
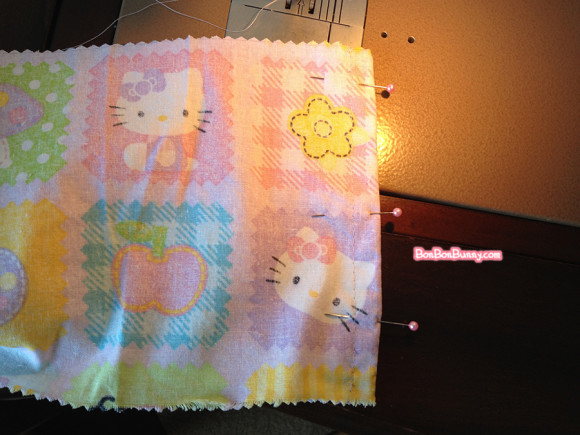
I’m measuring and marking the main fabric
about 14 inches down, making my marks on the wrong side
so that I do not ruin the pretty pattern~
This kind of skirt is incredibly simple.
Cotton fabric like this opens up to about 45″ across when unfolded,
so all I’m doing is cutting an entire piece of that 45″ length
that is 14″ wide.
This makes a skirt that is ‘miniskirt’-like, as the finished photos show.
When I want to make a very full skirt such as for Lolita,
I would do TWO full 45″ pieces that are cut to the length that I want the skirt to be.
–

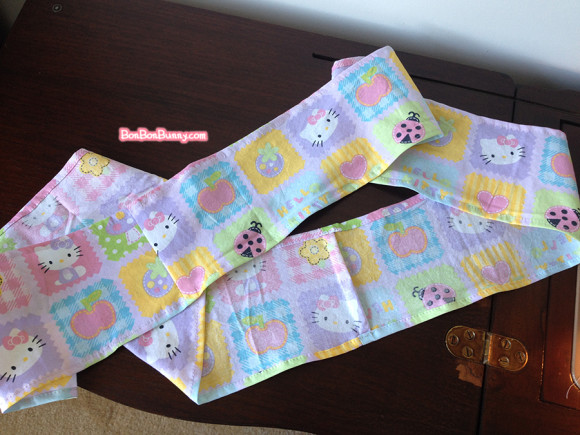
The contrast piece gets several marks made down it,
but it is opened up to 45″ and the whole width is being used,
just like the other piece.
Since this will be the ruffles along the bottom and it needs to be fuller
than the main skirt piece, I cut two rows of it.
And then, a third row that will serve as the skirt’s waistband.
(I end up abandoning the idea for a waistband later and removing it,
so you do not see a waistband in the finished photo at the top of the page.)
–
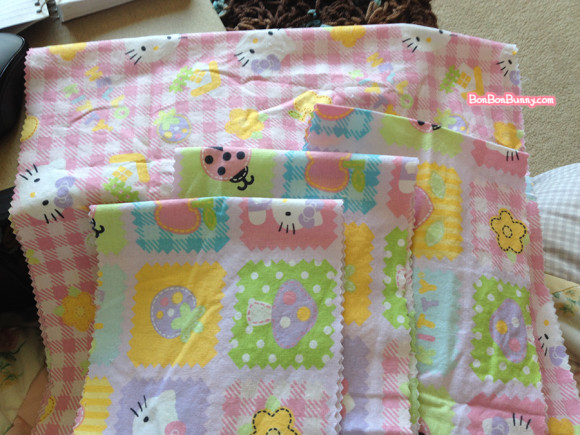
Here is my single piece of 45″ x 14″ main fabric,
and three strips of 45″ x 4″ or 5″ contrast
(the width of the ruffles is up to your preference for how long you’d like them to be!).
–
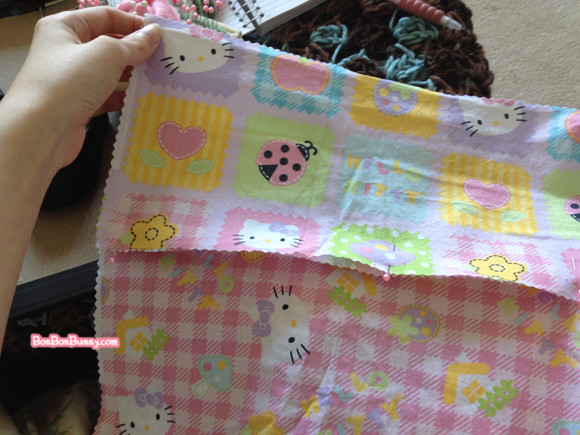
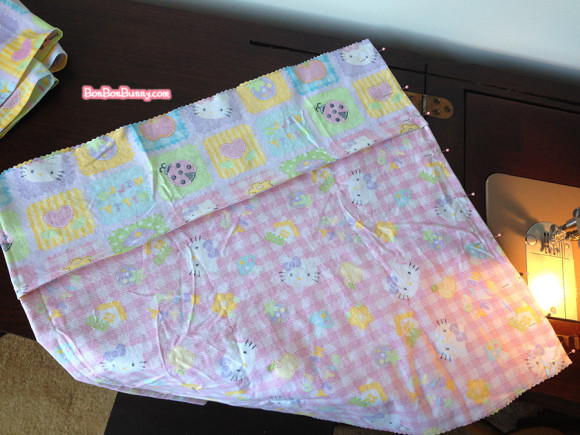
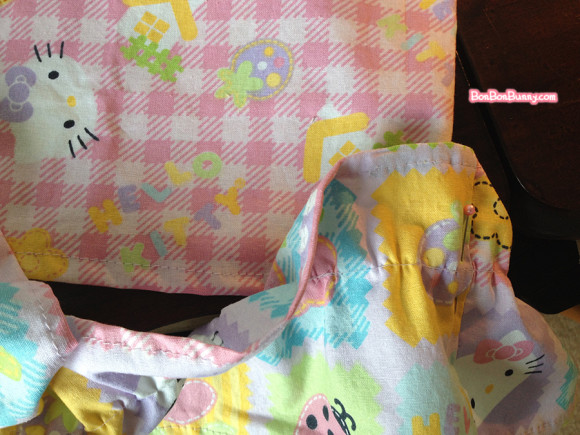
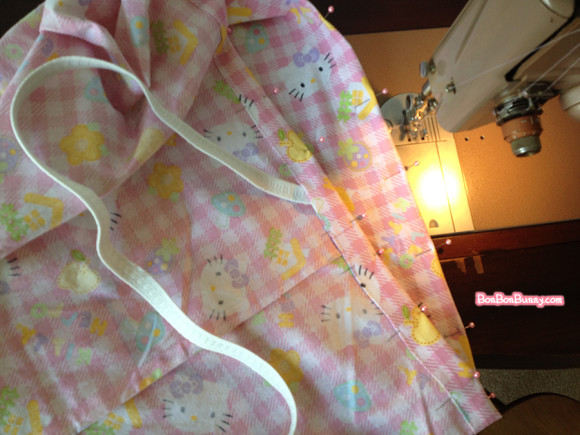
Now I’m pinning one strip of the contrast along the top of the main fabric
to serve as the waistband. It looks like I have my pins on the incorrect side
by putting them on the right side of the fabric, but this is my preference
because I French seam everything so that they are neat and finished on the inside.
Anyway, in the end I removed this waistband,
so even after putting the time & effort into pinning and sewing it,
you’re going to see me take it apart again several steps from now. ・°・(ノД`)・°・
–
The waistband and main fabric are French seamed,
and you can see my pins along the side
which will be the vertical seam at the back of the skirt!
–
Moving on to the next pieces,
the two strips that will form the ruffles get pinned together at both ends,
so that they make one loooooong strip.
–
Here are the ends of the strip sewn together.
–
Then, the time-consuming part is folding over both sides of those loooong edges
and hemming them so that they are neat.
–
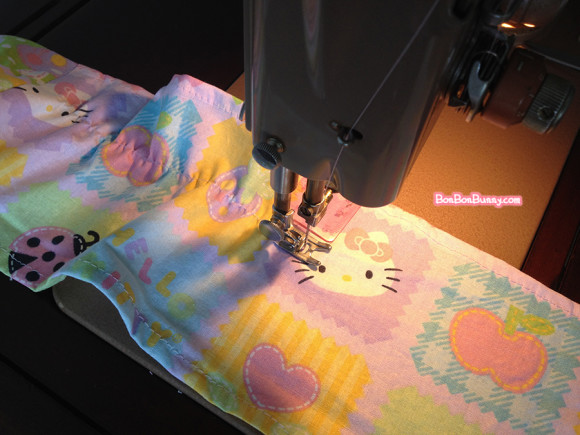
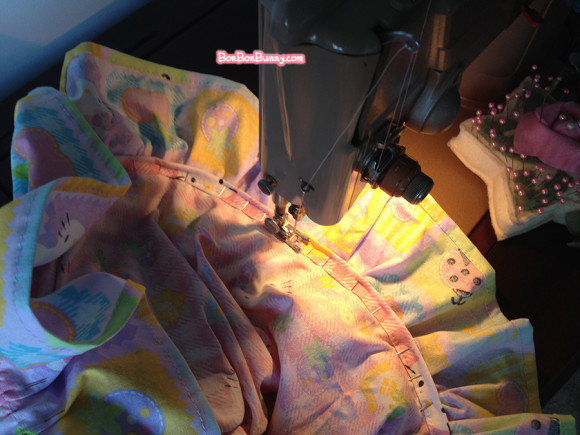
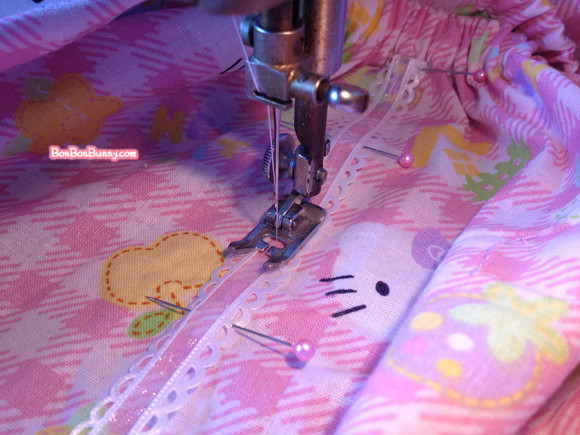
I was lucky to get a ruffle foot with my machine,
so here I am running a ruffling stitch 1″ down from the top of the strip.
Alternatively, you can do this by hand by running a hand needle over and under
and gathering as you go, or by making a straight seam by machine
and slowly pushing the fabric under the needle to gather it.
–
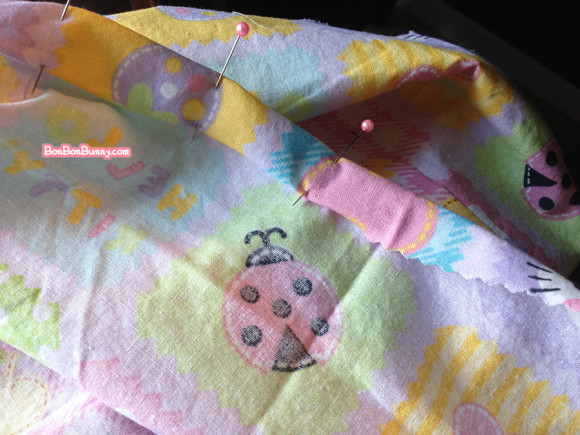
The ruffled strip gets pinned along the bottom hem of the main skirt
(btw the main skirt gets a hem along the bottom…).
–
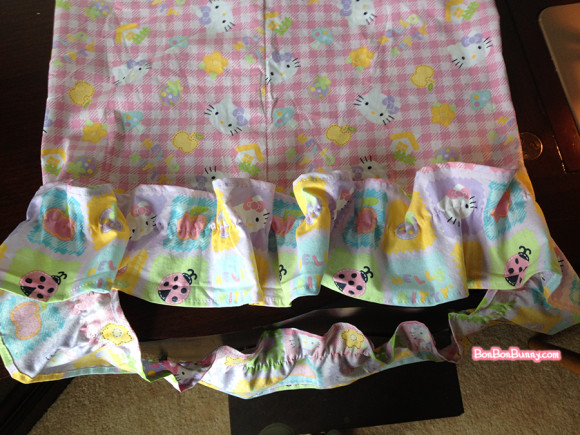
As you pin you will probably have to keep gathering by hand
and pinning evenly, overlapping the ruffles when needed
to get them down to size for the skirt.
–
Even if it ends up using a LOT of pins, it’s worth it!
–
Now I’m sewing the gathered ruffles along the bottom of the skirt for real.
–
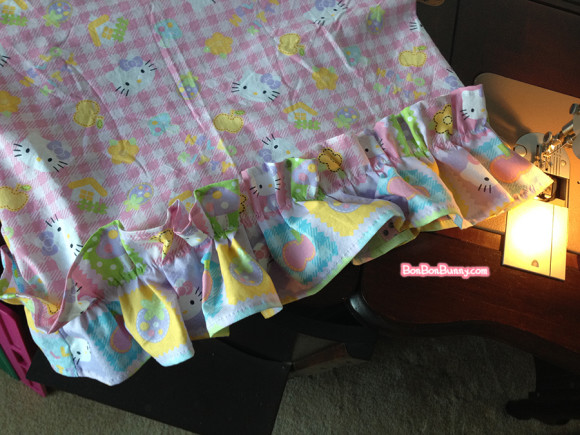
Pretty neat!!
–
Now, the top of the waistband gets folded over to make a channel for
elastic to go through. It needs to be wide enough to fit the elastic
and rolled under slightly for a neat finish.
Sew riiight along the very edge of the folded-under part.
–
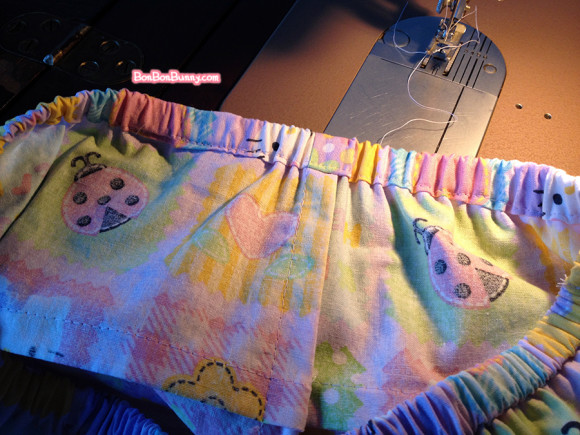
Elastic is easy to push through if you attach a safety pin on one end.
This is how super neat the waistband and its elastic looks when done!
–

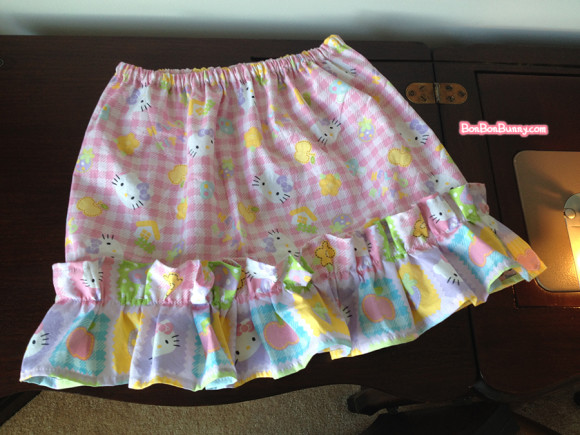
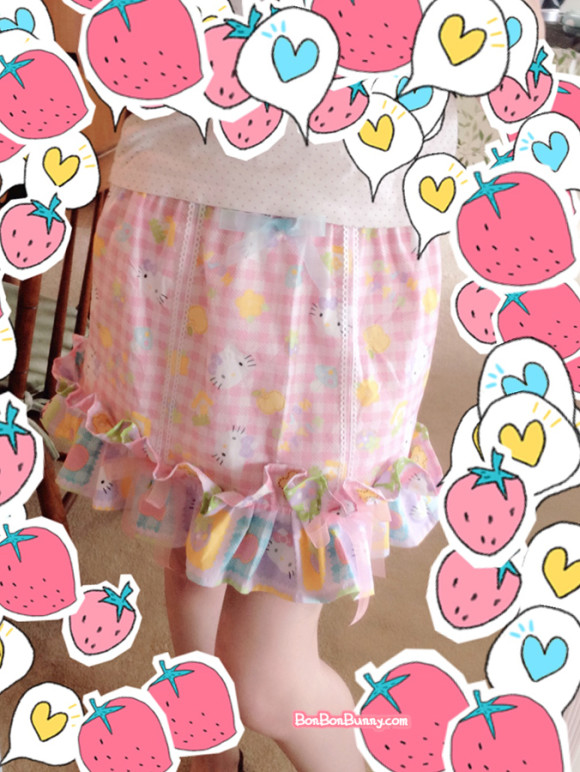
This skirt is finished!
It’s technically wearable right now,
but I decided at this point that I didn’t like the shape of it.
If I’d used twice as much width for the main pink fabric,
then it would look cute because it would flare out,
but with the waistband and main fabric being the same width,
it just looks weirdly shapeless.
–
I slept on it before doing so, but finally decided that the waistband had to go.
–
I pulled the elastic out of it too, and folded over the top of the main piece
to make a new elastic channel, and recycled the same piece of elastic.
–
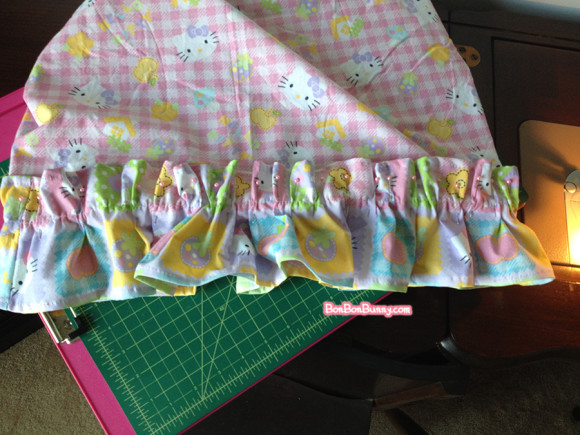
There we go – this shape is much cuter!!
–
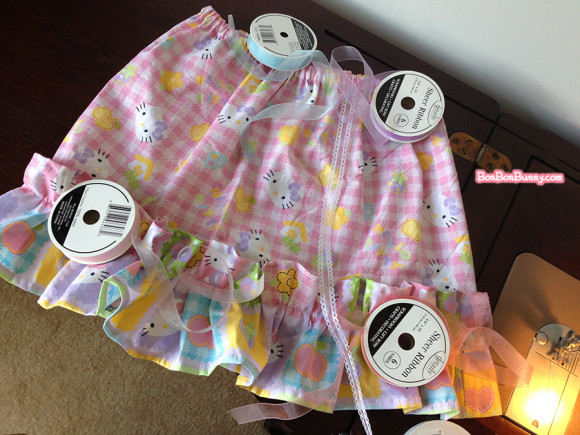
Now to add details!!
Get out all of your favorite ribbon and trimmings and lay stuff out,
deciding what would look nice and where.
–
Pin your preferred details in place and sew them down.
–
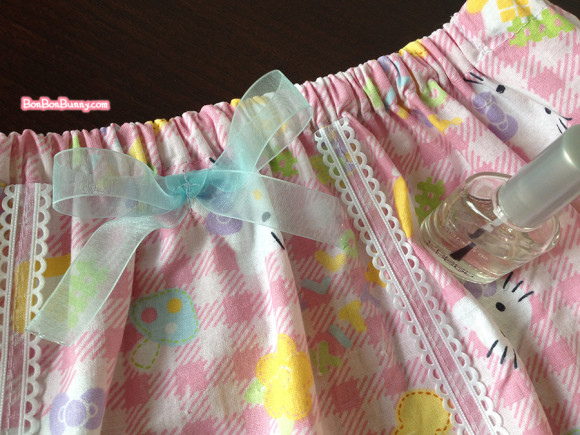
I even sewed down ribbin bows in a T-shape across their center.
Clear nail polish is awesome for dabbing on the ends of cut ribbon
to keep it from fraying.
–
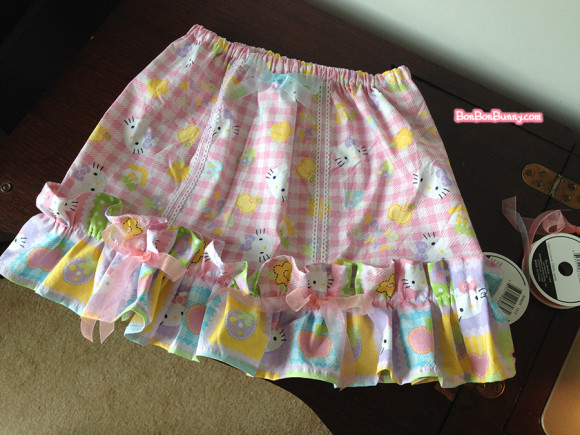
Here are all of the details done!!
The skirt is finished!!
–
The blue bow at the top is cute and visible if your top raises enough to show it…
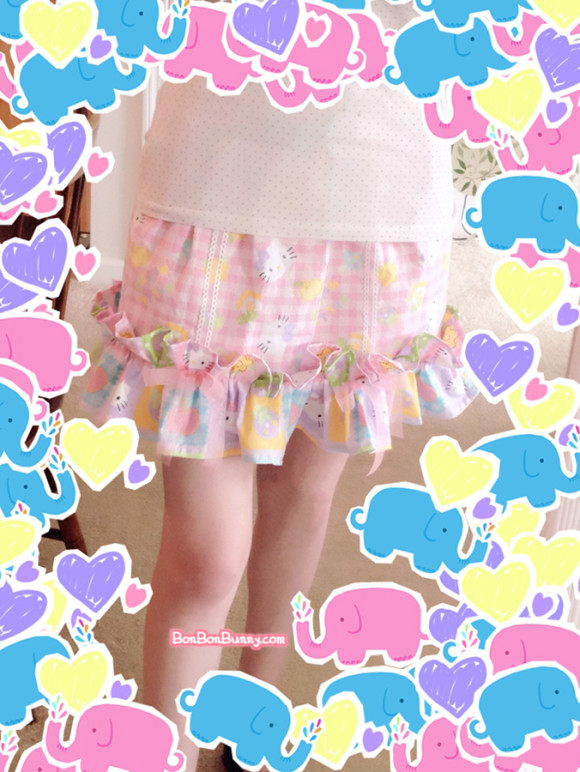
…but it looks cute with a top that hangs below the waistband, too!!
I am happy with this project even through the mistakes I made with it!
I needed to make those mistakes with this skirt in order to learn from them.
I learned that 1 length of 45″ wide fabric is fine for this miniskirt-like look,
but that I should use twice that much if I want a full, ruffly skirt.
Thankfully, even this style of skirt is fine for Fairy-kei,
because its rules are so lenient!
I am still able to enjoy this adorable skirt, and I LOVE its ruffles and bows!!
![]()
![]()