Super Easy Wide Fabric & Elastic Headband DIY Tutorial + Pattern
Saturday, June 27th, 2015
Hello lovelies!! I mentioned the wide headband that I made in my bell-sleeved dress post, so here is my tutorial detailing how to make one yourself!!

The headband is shown here almost completely hidden under this giant bow. Adding details to this headband is VERY EASY!!! I have suggestions for potential details at the end of the tutorial!
Now, let’s begin the tutorial!!
Drawing your Headband Shape
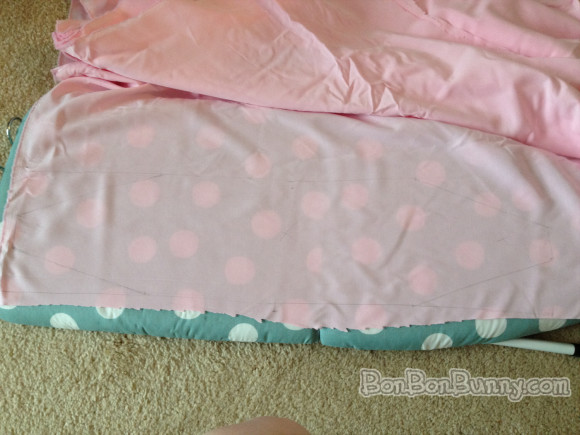
Here, you can see how messily I’ve scribbled a rough pattern shape onto the wrong side of the fabric. I didn’t even use a marking pencil, just a mechanical pencil that was nearby LOL.
Anyway, the shape is 24 inches long. At its widest point in the middle, it is 6 inches wide. It’s going to be folded in half, so a 6 inch wide shape here will make a finished headband that is 3 inches wide. When I tried it on later, I actually found 3 inches to be cloooose to being too wide. For future headbands, I think that I will make them 4 inches wide at this step, resulting in a 2 inch wide headband.
The shape tapers in at the ends to about 2 inches wide – this is the part that’s going to be underneath and at the back of your head, and it’s where the elastic is going to be fed through. It’s not really necessary to taper the shape in like that, though, and in fact, since I said that future headbands that I make will be slightly narrower, I probably won’t taper the ends at all, and just use a long, simple rectangular piece.
You’ll also notice a small X drawn in the center of the piece – that’s to remind myself which side is the wrong side!
Cut and Fold in Half
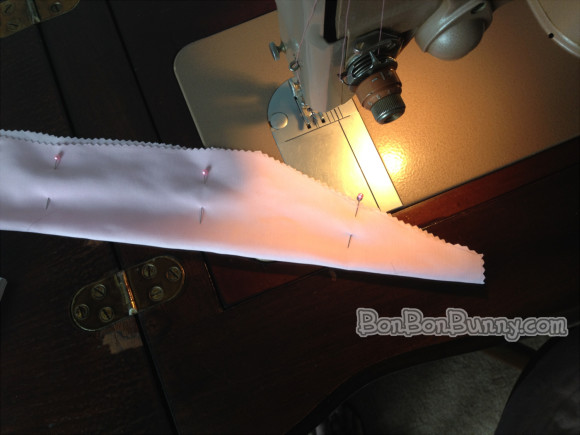
I used pinking shears to cut mine, which keeps little thread pieces from falling out everywhere, but this is my own preference and you can certainly use regular fabric scissors.
Fold it in half longways, with the WRONG side out, and pin in place.
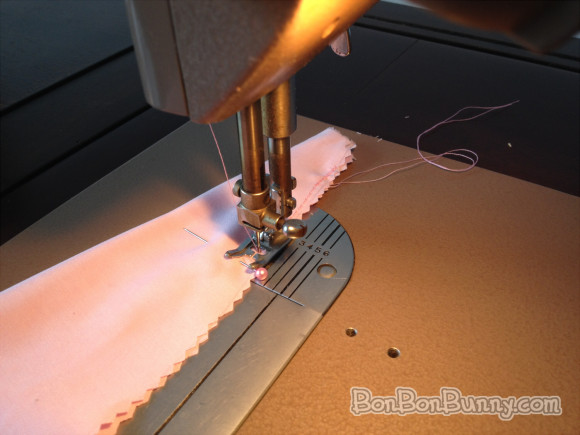
Sewing
DON’T sew the narrow ends – just sew along the long side, close to the edge. Be sure to backstitch, because you will need that reinforcement there when turning it inside out later!
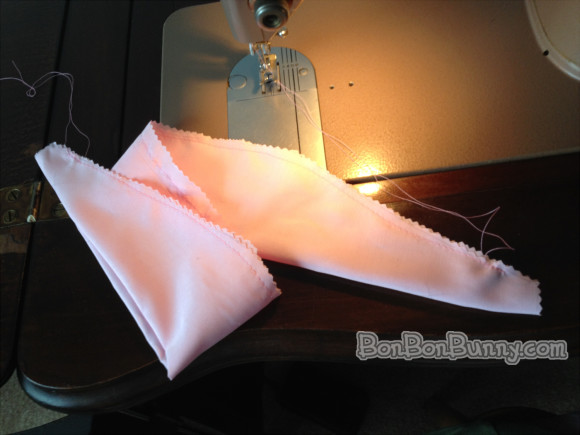
Well, that one straight stitch was pretty much the whole project. We’re almost finished at this point lol. All that’s left is turning it right side out and putting a tiny piece of elastic in at the bottom!
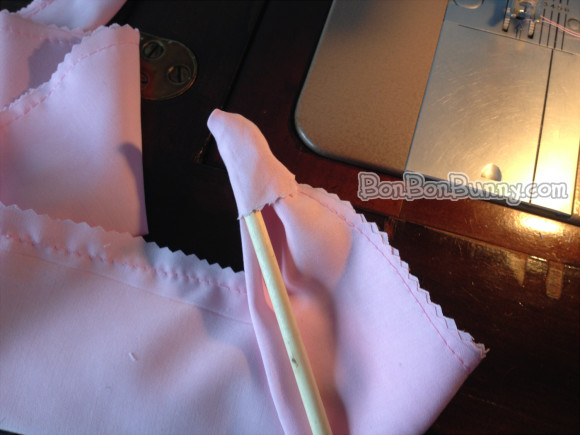
Turning Right Side Out
The beginning of this step is the only hard part, because the ends are so narrow. I have a wooden dowel nearby my sewing supplies that helps me push fabric through, like pictured here. Any pointy-but-blunt object will work, like the end of a pen.
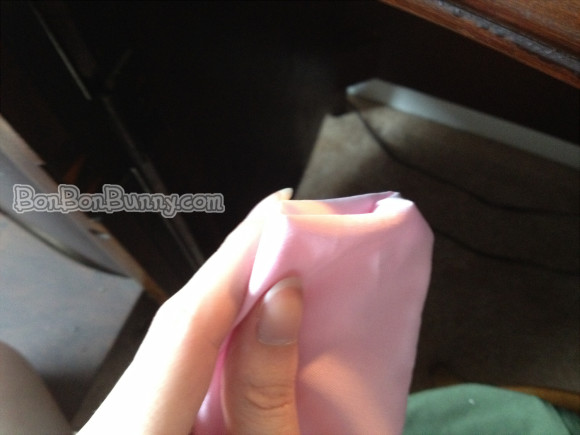
Almost Done Turning
Much easier at this point.
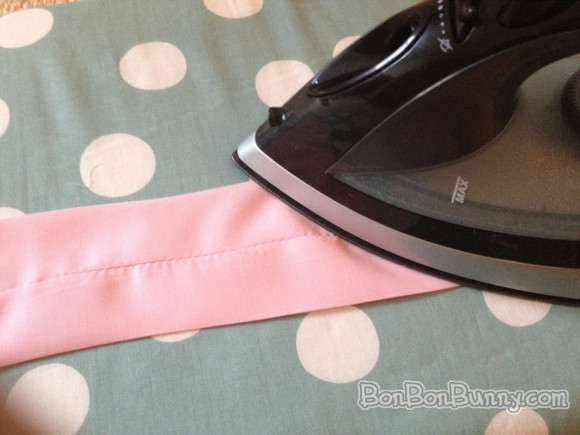
Fold and Press
With your right-side-out headband, fold it in a way so that the seam is at the bottom center, then iron it so that it’s pressed nice and flat. The fact that you can see small puckers in the fabric along my seam means that the tension on my machine was too tight. Don’t be like me. Don’t make my mistakes.
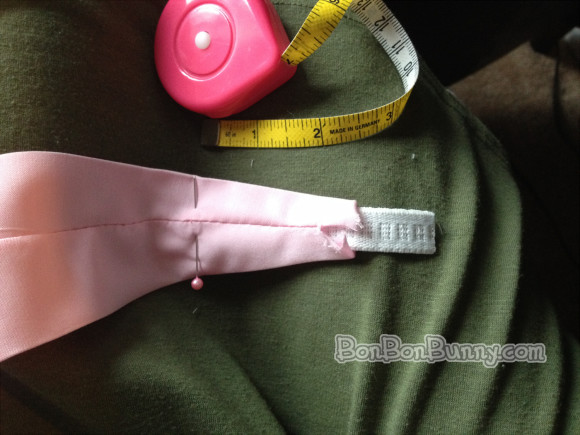
Pinning Elastic in Place
Simply cut 3 inches of elastic. What we’re going to do is feed it into the narrow ends, about 3 inches deep. Hold the ends with pins while you’re working. A lot of the fabric is going to get pushed together and gathered around those three inches. That’s what you want, so that it stretches properly and holds on to your head~
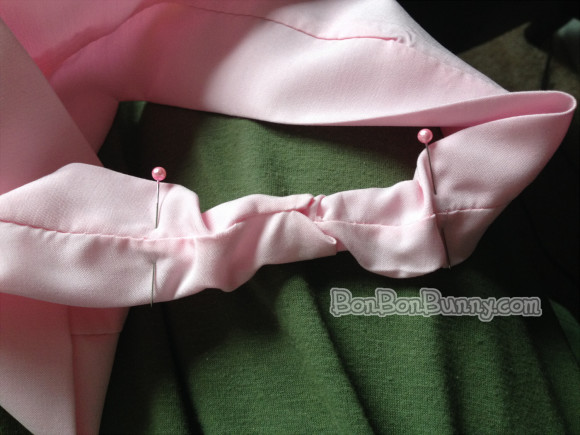
Fold the rough ends of those edges under, too, so that they look finished. Mine is still messy. It’s okay to be messy. It’s good for you. Very therapeutic.

Stitch Over Elastic
These stitches are over the ends of the elastic that are inside the headband. Go over them several times, backstitching to make sure they are each held securely.
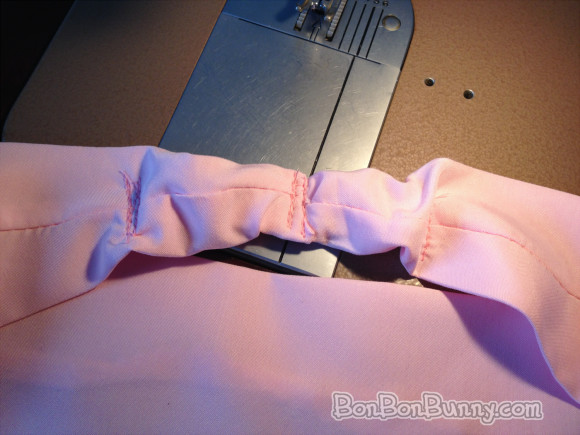
Go over the middle, too, to close up the opening! Messiness is A-OK.
And you are finished!! Try it on to make sure it’s comfortably snug~
And these headbands are highly customizable!!
- You can leave yours blank like mine so that you can pin detachable bows or brooches onto it for mixy-matchy accessories!!
- Sew ribbon or lace down the center, longways, for contrast!
- Or cris-cross ribbon over it for that Lolita headdress look, especially in combination with the next suggestion:
- Sew lace along the front and back edges!!
- Or just one edge – mix it up!
- Make a ruffle from fabric and sew that along one edge – you could make a psuedo-bonnet!
- BOWS!!! Big bows at the center or to one side or the other, small bows on either side, THE POSSIBILITIES ARE ENDLESS.
- Attach long ribbons (or long-tailed ribbon bows) near where the headband rests near your ears so that they trail over your shoulders and hair~
- Drape strings of pearls so that they hang off of it for a pretty mermaid look!
I could keep listing things for ever and ever. o_o I bet you can come up with things too!!