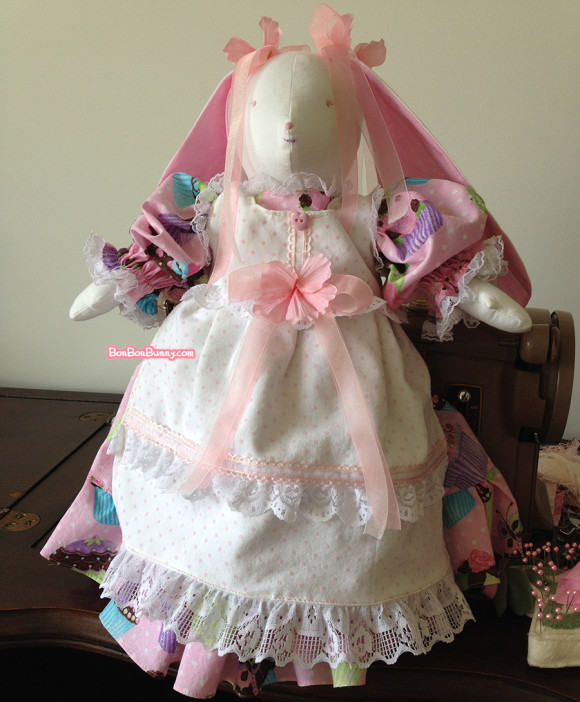
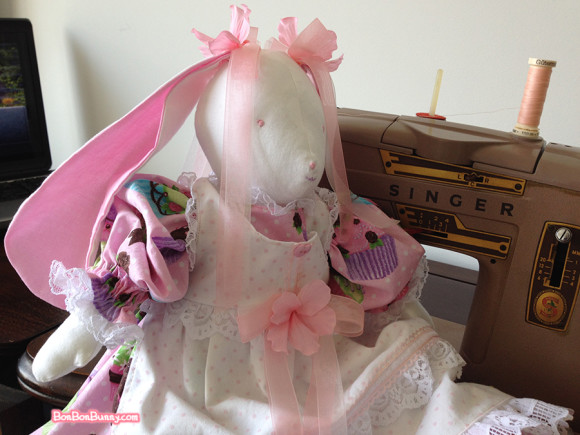
All posts under 'Plush & Sewing'

Sewing a Himekaji Pink Bunny Toile Skirt DIY Tutorial

Monday, November 23rd, 2015

In just a single day, I sewed this extremely cute and pretty skirt in a dusty pink color and classical, vintage-looking print – I thought it would be perfect for wearing on Thanksgiving!

Himekaji Pink Bunny Toile Skirt (7)

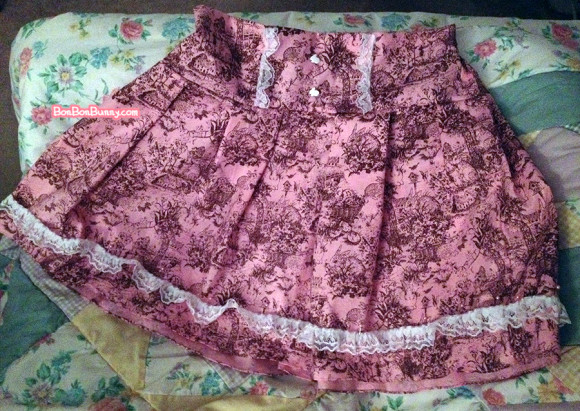
Here is the finished skirt!!
It has a high waist and is incredibly full in shape.

Himekaji Pink Bunny Toile Skirt (1)

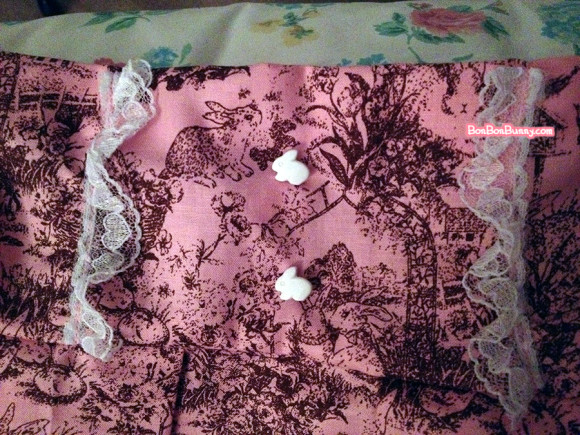
This is a close-up of the fabric –
a classical-looking toile print covered in BUNNIES!!
From afar, you can hardly tell that there are bunnies there at all.

They are secret bunnies.

Now I’ll let you know how I made it!!

Himekaji Pink Bunny Toile Skirt (2)

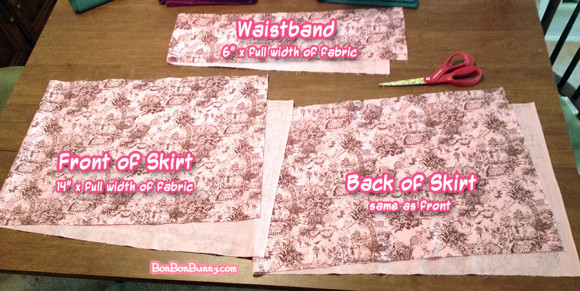
These three incredibly simple, rectangular shapes are all you need to cut out.
Cotton fabric comes in aboout 45″ wide, folded at the middle.
For rectangular pieces like these, all you do is measure the length down for each piece
and cut allllll the way across that 45″-ish width.

Using twice the amount of length that the waistband has
is what makes the skirt so fluffy and full!!

I like this method more than making a circle skirt pattern,
because the entire cut of fabric gets used without ANY scraps,
AND you don’t have the problem where your print is upside down at the back.

Himekaji Pink Bunny Toile Skirt (3)

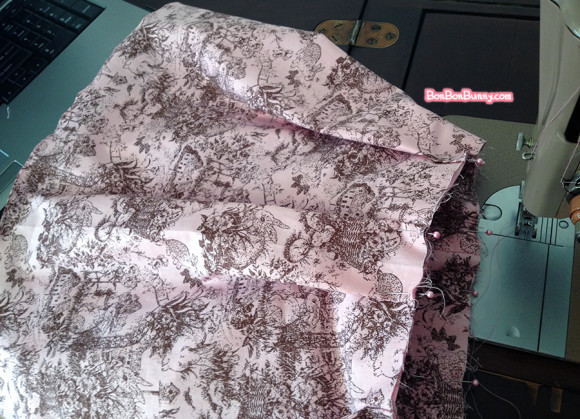
The front & back panels get seamed together to make one huge “tube”-like shape,
then hemmed along the bottom.
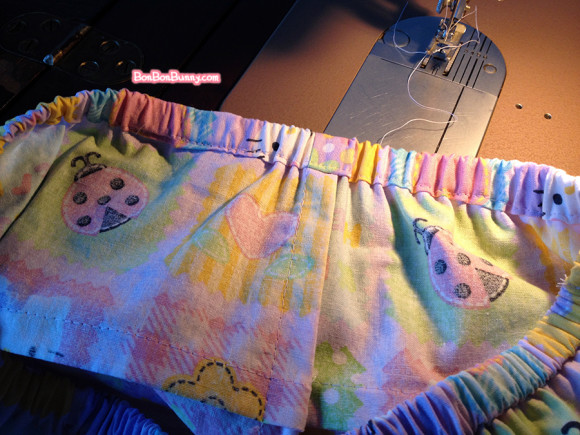
In the above picture, I’m using lazy box-pleat-like gathers to match up the width
of the front + back skirt pieces with the waistband.
However, I do not iron the box-pleats down,
because I want it to fall like ruffles and not actual pleats.

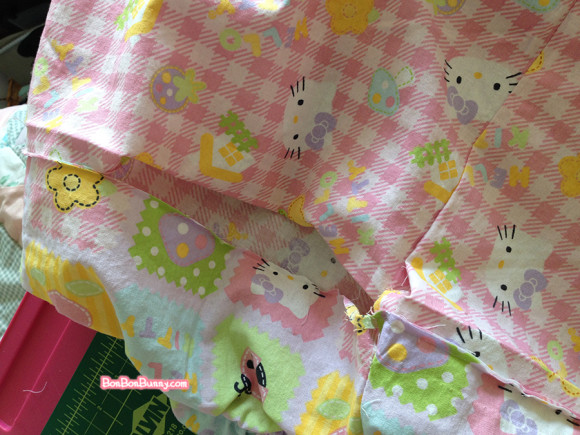
Oh, and I always sew wrong-sides-together first, since I use French seams all the time
so that all of the seams are extremely sturdy and finished-looking on the inside.

Himekaji Pink Bunny Toile Skirt (4)

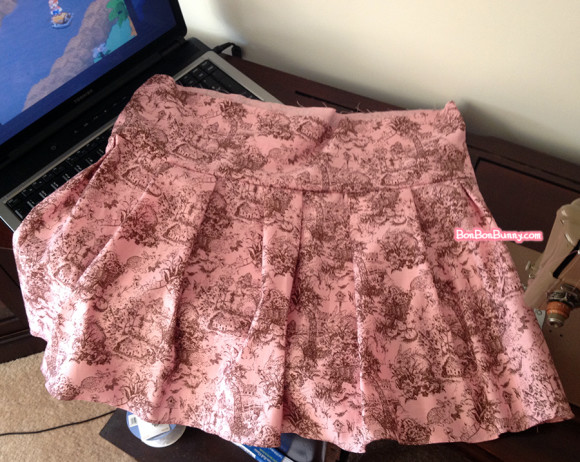
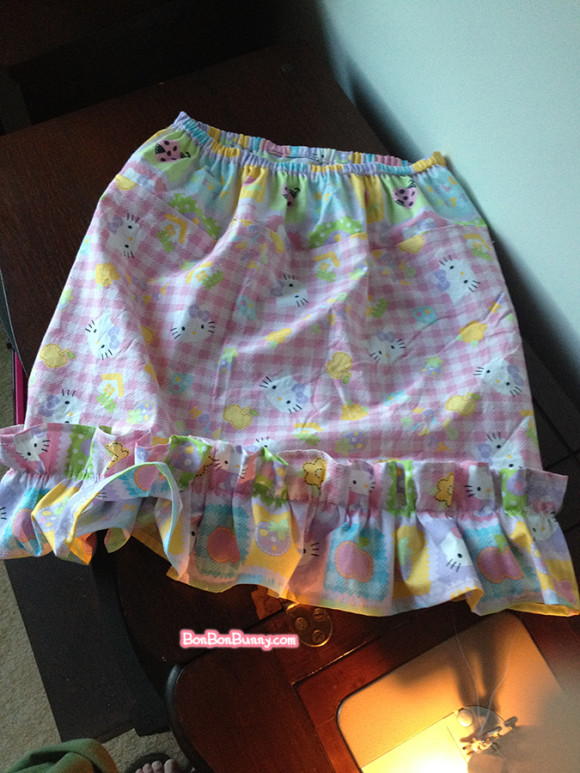
Here is the “after” of the above picture – the waistband
and the two skirt panels all attached!!
The waistband is about to be folded over at the top,
with a channel for elastic to go through ONLY on the back.
The front will be laying flat – that’s what gives it the high-waisted skirt appearance!

You can also see in this picture that while I am spending all of these hours sewing,
I keep myself entertained by watching Youtube vids of video games. :p
For this particular project, it was the Best Friends playing Super Mario RPG.

Himekaji Pink Bunny Toile Skirt (5)

In just one afternoon, I had finished practically an entire skirt!!
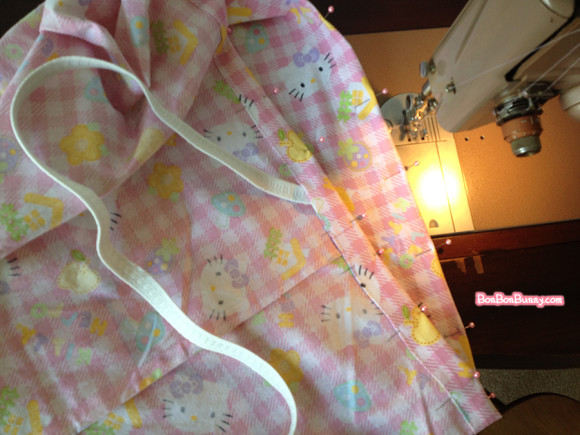
The lace details are simple – just lengths of lace sewn on in easy straight lines.
Actually, in the above pic, the bottom row of lace is pinned on
and not actually sewn yet.
The buttons are sen on by hand.  By the way –

Himekaji Pink Bunny Toile Skirt (6)

Look at these tiny bunny buttons!!!

Himekaji Pink Bunny Toile Skirt (7)

Since I took a little break after making so much progress in the above pics,
it gave me time to decide that I wanted to scoot the bottom row of lace
up by a couple of inches before finally sewing it in place.
Stepping back for an hour (or day) is usually so beneficial!!

I’m so excited to have something this classical-looking and cute.
It looks like something that Liz Lisa would produce, and I never thought
that I’d own anything as pretty as anything of theirs.
I’m so excited to wear this for Thanksgiving
and any other coords I want to create with it!!

How to Make a Kawaii Pastel Hello Kitty Fairy-kei Skirt DIY Tutorial

Tuesday, October 13th, 2015

hello kitty fairy kei skirt sewing tutorial (25)

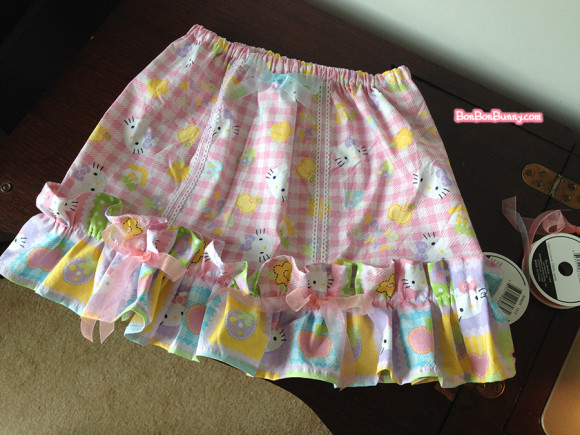
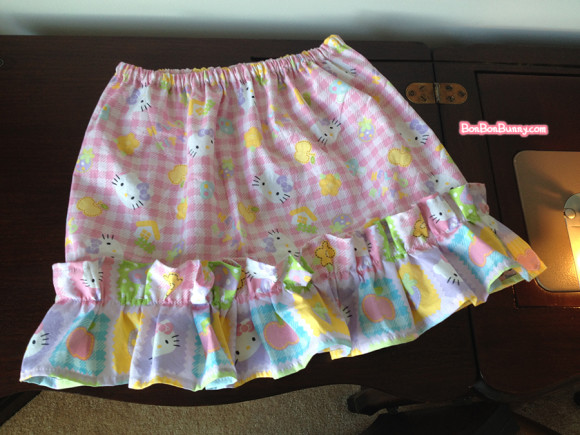
Hello friends!! ヾ(@°▽°@)ノ  Today I will share how I made a very cute and pastel Hello Kitty skirt for fairy-kei!!  It is very ruffly and cute!!  I made some changes to it while I worked, so you will also see how I fix things on the fly so that I like them better~

There aren’t any pattern pieces needed for this – the pieces are all rectangles!

hello kitty fairy kei skirt sewing tutorial (1)

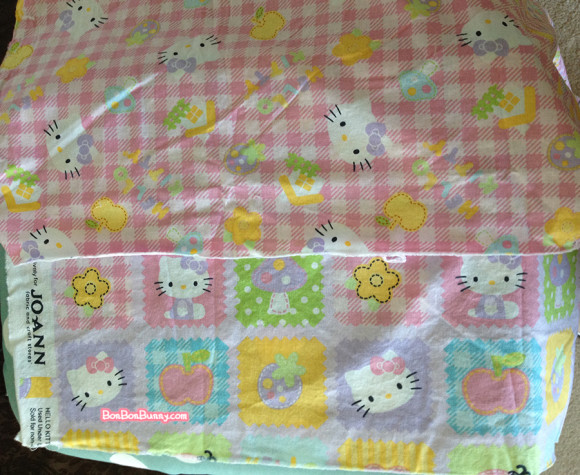
Here are my fabric choices –
some cute coordinating fabrics with Hello Kitty designs in pastel colors!
The pink gingham will be our ‘main’ fabric choice
while the squares will be contrast pieces

hello kitty fairy kei skirt sewing tutorial (2)

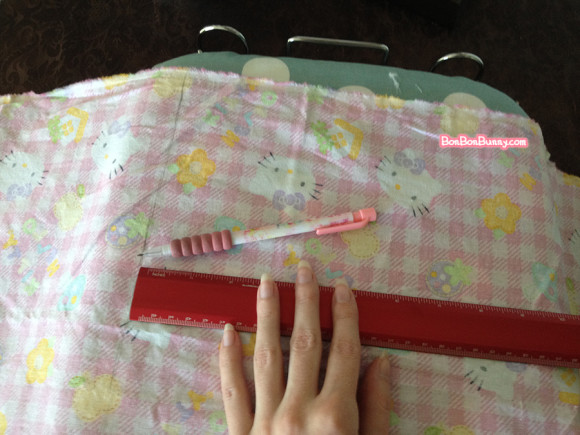
I’m measuring and marking the main fabric
about 14 inches down, making my marks on the wrong side
so that I do not ruin the pretty pattern~

This kind of skirt is incredibly simple.
Cotton fabric like this opens up to about 45″ across when unfolded,
so all I’m doing is cutting an entire piece of that 45″ length
that is 14″ wide.

This makes a skirt that is ‘miniskirt’-like, as the finished photos show.
When I want to make a very full skirt such as for Lolita,
I would do TWO full 45″ pieces that are cut to the length that I want the skirt to be.

hello kitty fairy kei skirt sewing tutorial (3)

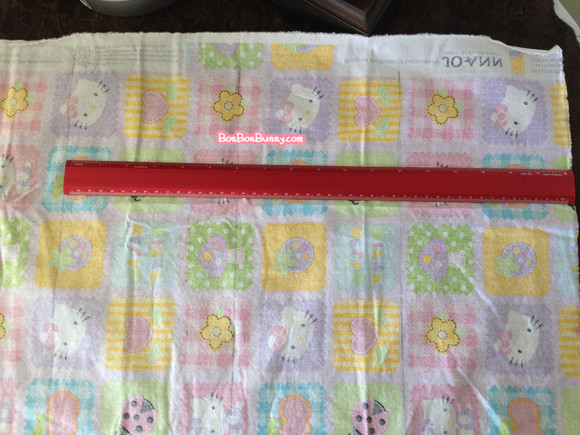
The contrast piece gets several marks made down it,
but it is opened up to 45″ and the whole width is being used,
just like the other piece.
Since this will be the ruffles along the bottom and it needs to be fuller
than the main skirt piece, I cut two rows of it.
And then, a third row that will serve as the skirt’s waistband.
(I end up abandoning the idea for a waistband later and removing it,
so you do not see a waistband in the finished photo at the top of the page.)

hello kitty fairy kei skirt sewing tutorial (4)

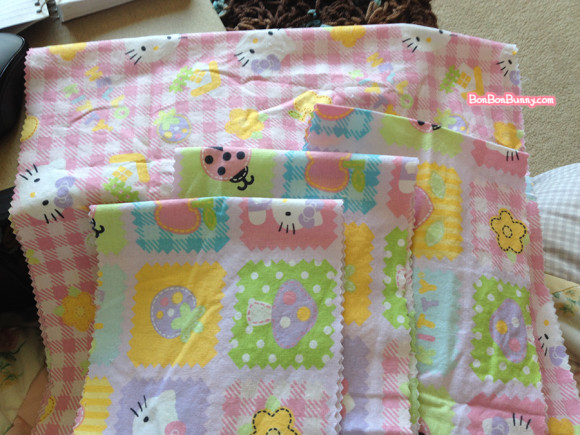
Here is my single piece of 45″ x 14″ main fabric,
and three strips of 45″ x 4″ or 5″ contrast
(the width of the ruffles is up to your preference for how long you’d like them to be!).

hello kitty fairy kei skirt sewing tutorial (6)

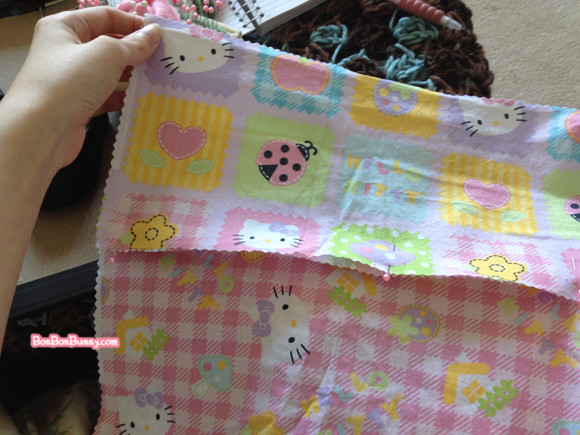
Now I’m pinning one strip of the contrast along the top of the main fabric
to serve as the waistband.  It looks like I have my pins on the incorrect side
by putting them on the right side of the fabric, but this is my preference
because I French seam everything so that they are neat and finished on the inside.

Anyway, in the end I removed this waistband,
so even after putting the time & effort into pinning and sewing it,
you’re going to see me take it apart again several steps from now. ・°・(ノД`)・°・

hello kitty fairy kei skirt sewing tutorial (9)

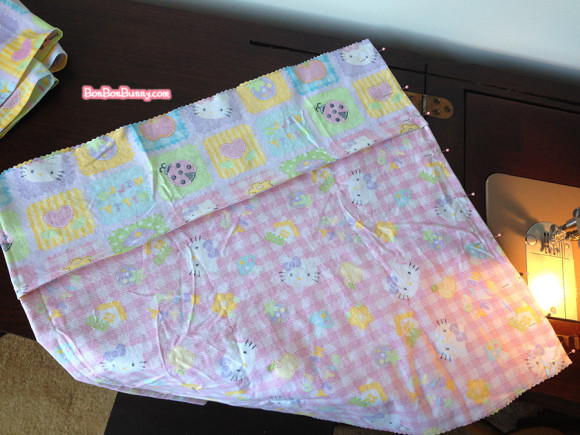
The waistband and main fabric are French seamed,
and you can see my pins along the side
which will be the vertical seam at the back of the skirt!

hello kitty fairy kei skirt sewing tutorial (5)

Moving on to the next pieces,
the two strips that will form the ruffles get pinned together at both ends,
so that they make one loooooong strip.

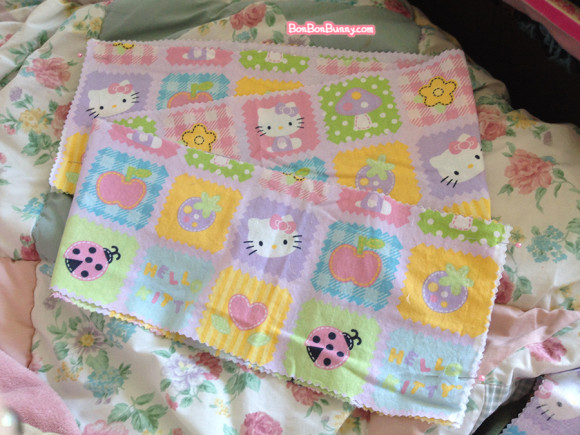
hello kitty fairy kei skirt sewing tutorial (7)

Here are the ends of the strip sewn together.

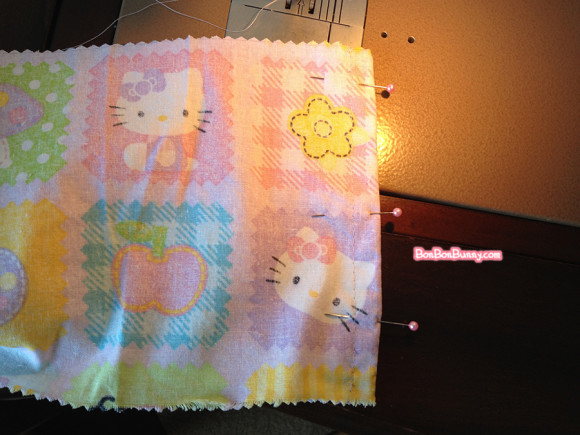
hello kitty fairy kei skirt sewing tutorial (8)

Then, the time-consuming part is folding over both sides of those loooong edges
and hemming them so that they are neat.

hello kitty fairy kei skirt sewing tutorial (10)

I was lucky to get a ruffle foot with my machine,
so here I am running a ruffling stitch 1″ down from the top of the strip.

Alternatively, you can do this by hand by running a hand needle over and under
and gathering as you go, or by making a straight seam by machine
and slowly pushing the fabric under the needle to gather it.

hello kitty fairy kei skirt sewing tutorial (11)

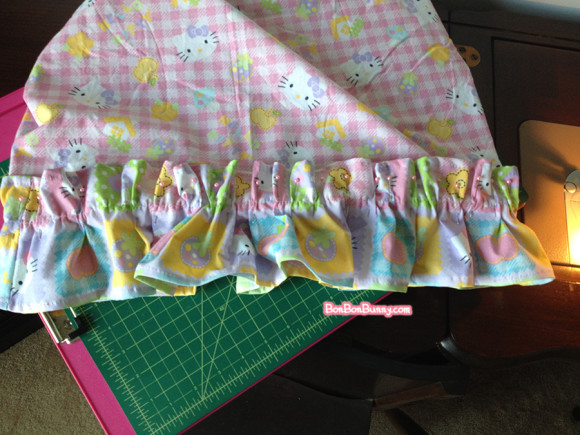
The ruffled strip gets pinned along the bottom hem of the main skirt
(btw the main skirt gets a hem along the bottom…).

hello kitty fairy kei skirt sewing tutorial (12)

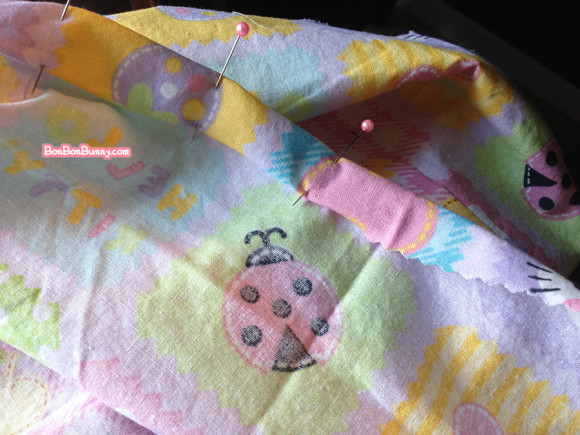
As you pin you will probably have to keep gathering by hand
and pinning evenly, overlapping the ruffles when needed
to get them down to size for the skirt.

hello kitty fairy kei skirt sewing tutorial (13)

Even if it ends up using a LOT of pins, it’s worth it!

hello kitty fairy kei skirt sewing tutorial (14)

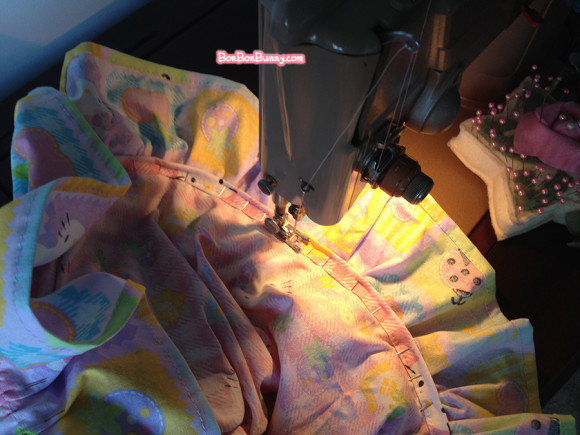
Now I’m sewing the gathered ruffles along the bottom of the skirt for real.

hello kitty fairy kei skirt sewing tutorial (15)

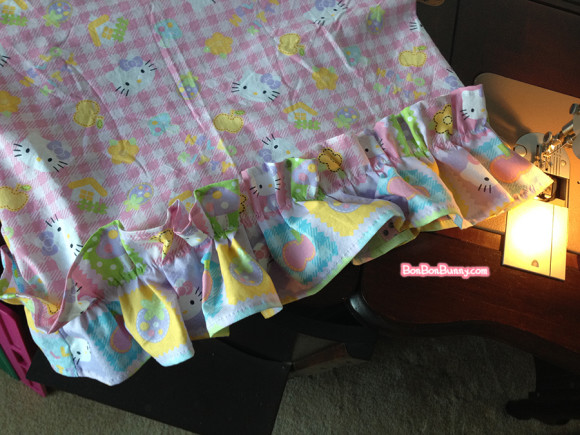
Pretty neat!!

hello kitty fairy kei skirt sewing tutorial (16)

Now, the top of the waistband gets folded over to make a channel for
elastic to go through.  It needs to be wide enough to fit the elastic
and rolled under slightly for a neat finish.
Sew riiight along the very edge of the folded-under part.

hello kitty fairy kei skirt sewing tutorial (17)

Elastic is easy to push through if you attach a safety pin on one end.
This is how super neat the waistband and its elastic looks when done!

hello kitty fairy kei skirt sewing tutorial (18)

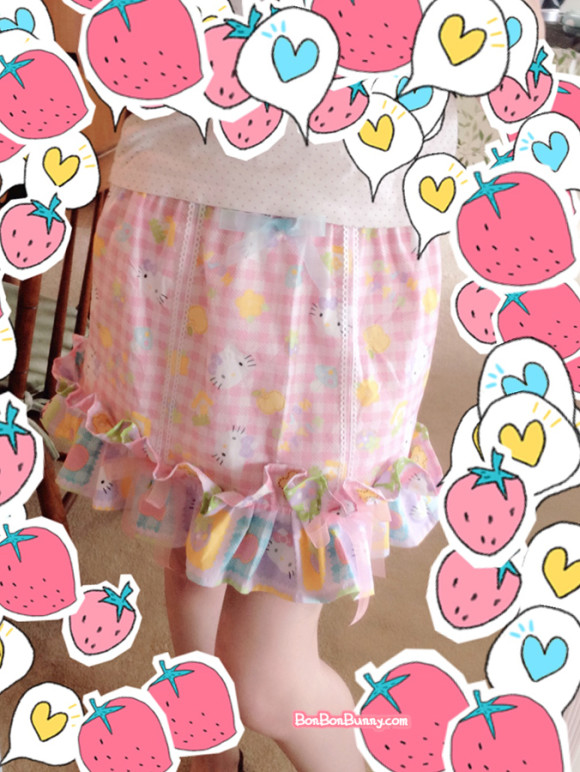
This skirt is finished!
It’s technically wearable right now,
but I decided at this point that I didn’t like the shape of it.
If I’d used twice as much width for the main pink fabric,
then it would look cute because it would flare out,
but with the waistband and main fabric being the same width,
it just looks weirdly shapeless.

hello kitty fairy kei skirt sewing tutorial (19)

I slept on it before doing so, but finally decided that the waistband had to go.

hello kitty fairy kei skirt sewing tutorial (20)

I pulled the elastic out of it too, and folded over the top of the main piece
to make a new elastic channel, and recycled the same piece of elastic.

hello kitty fairy kei skirt sewing tutorial (21)

There we go – this shape is much cuter!!

hello kitty fairy kei skirt sewing tutorial (22)

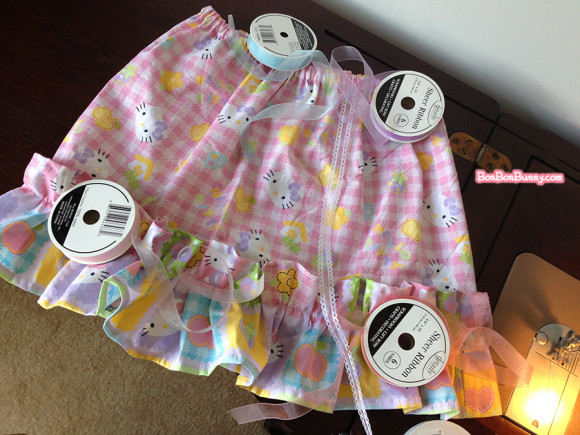
Now to add details!!
Get out all of your favorite ribbon and trimmings and lay stuff out,
deciding what would look nice and where.

hello kitty fairy kei skirt sewing tutorial (23)

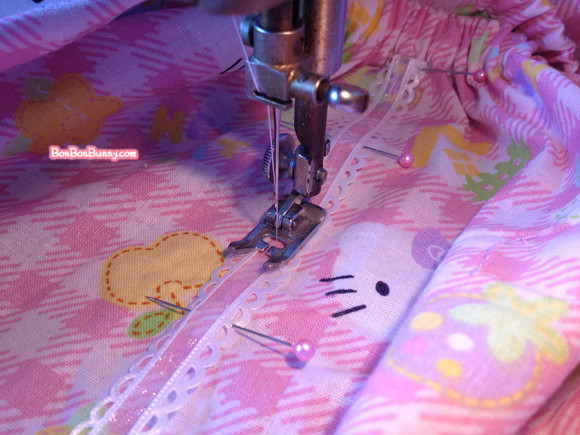
Pin your preferred details in place and sew them down.

hello kitty fairy kei skirt sewing tutorial (24)

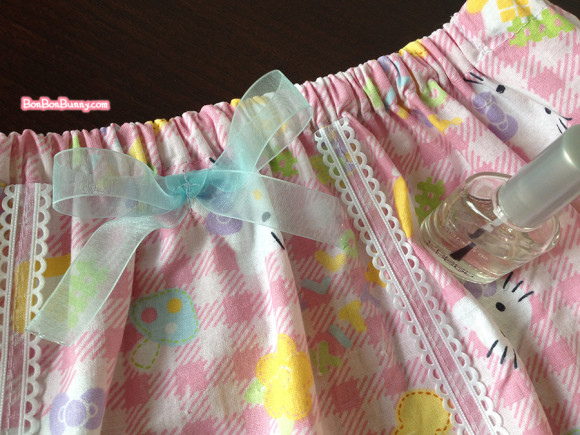
I even sewed down ribbin bows in a T-shape across their center.
Clear nail polish is awesome for dabbing on the ends of cut ribbon
to keep it from fraying.

hello kitty fairy kei skirt sewing tutorial (25)

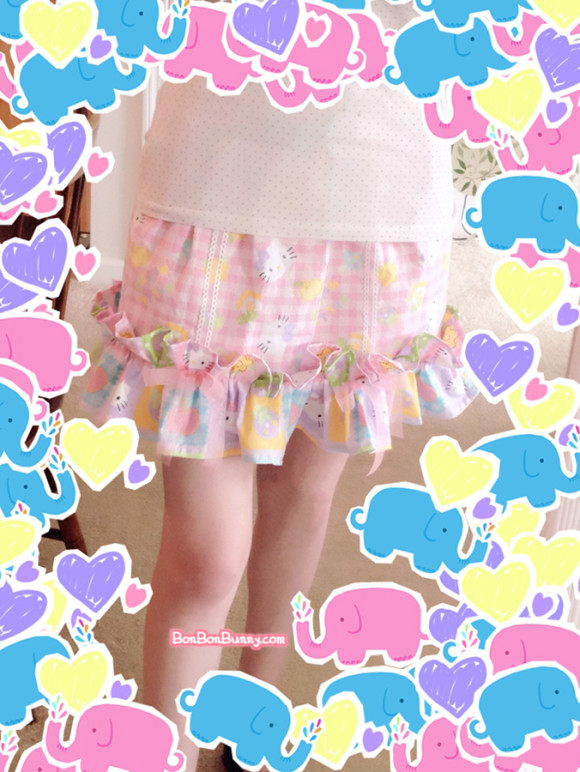
Here are all of the details done!!
The skirt is finished!!

hello kitty fairy kei skirt sewing tutorial (26)

The blue bow at the top is cute and visible if your top raises enough to show it…

hello kitty fairy kei skirt sewing tutorial (27)

…but it looks cute with a top that hangs below the waistband, too!!

I am happy with this project even through the mistakes I made with it!
I needed to make those mistakes with this skirt in order to learn from them.
I learned that 1 length of 45″ wide fabric is fine for this miniskirt-like look,
but that I should use twice that much if I want a full, ruffly skirt.

Thankfully, even this style of skirt is fine for Fairy-kei,
because its rules are so lenient!

I am still able to enjoy this adorable skirt, and I LOVE its ruffles and bows!!

Super Easy T-Shirt DIY For Slouchy Sleeves (And repair underarm stains)

Monday, October 5th, 2015

Here is an incredibly easy way to DIY a t-shirt to add some contrasting color to the sides and make your sleeves slouchier!!  It has the added benefit of snipping away that underarm part of the t-shirt that might be damaged or worn-out from sweat or deodorant.  You can repair an old favorite t-shirt and make it wearable again!!

easy tshirt diy slouchy sleeve to repair stains (1)

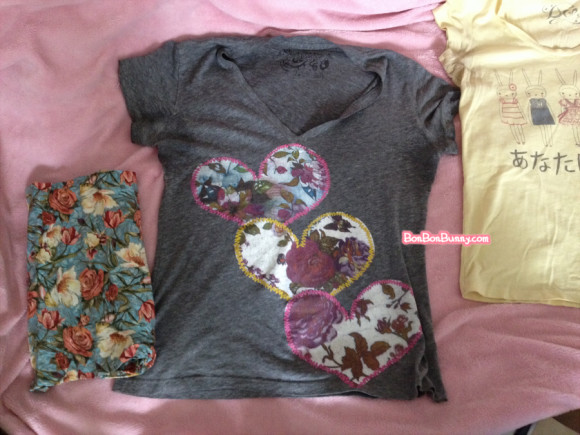
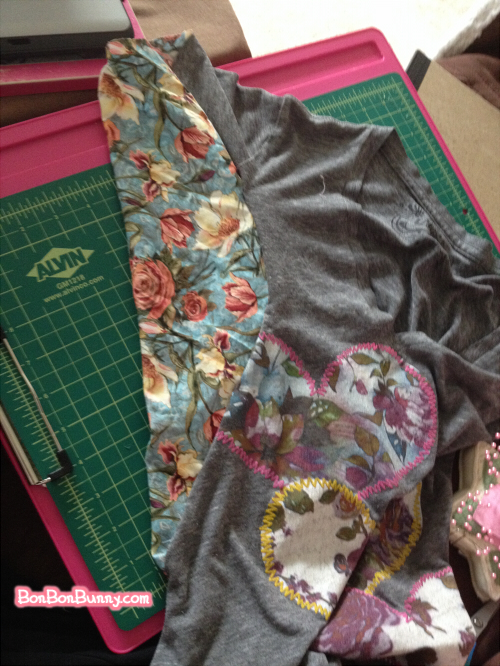
Here is my selected t-shirt: a super comfy and slightly oversized grey heather shirt
with floral hearts that have the appearance of being applique’d on~
Wearing this shirt soooo much has really worn out the underarms…
It’s really embarrassing sharing this photo!!  But I am doing so to show you that
you don’t have to be embarrassed either, because this damage is fixable.

The floral fabric on the left is what we’re going to DIY with,
and the yellow shirt on the right is another shirt that I wanted to do
a similar method with, so think of it as a preview for a future post!

easy tshirt diy slouchy sleeve to repair stains (3)

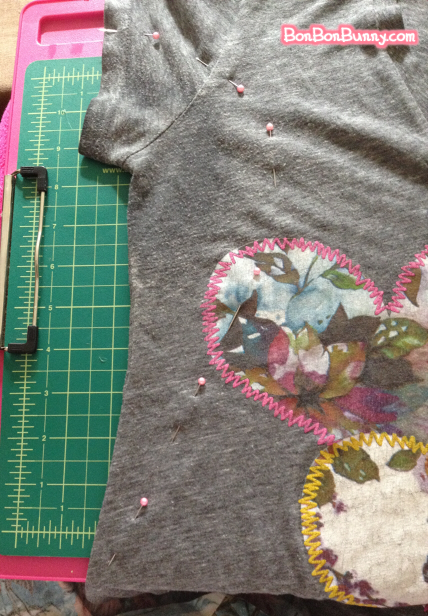
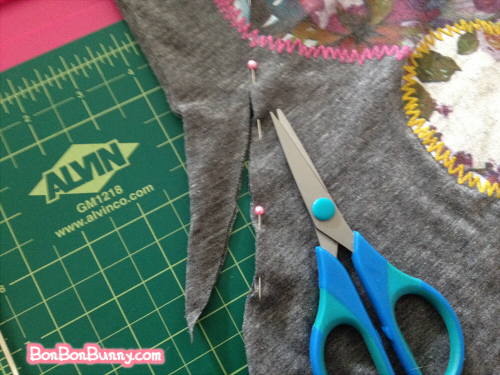
I used pins to mark out the curve I’m going to be cutting along.
There was no super scientific measuring done here –
I only ‘outlined’ the damaged area in a neatly curved way and extended it down.

easy tshirt diy slouchy sleeve to repair stains (4)

snip snop!
This part is nerve-wracking, because this is the part where you start going,
“Oh my god, I’m cutting into my favorite shirt, what am I doing?!”

easy tshirt diy slouchy sleeve to repair stains (5)

the snip snop has been done.

easy tshirt diy slouchy sleeve to repair stains (6)

Fold the shirt in half length-wise to cut an identical, symmetrical curve
on the other side.

easy tshirt diy slouchy sleeve to repair stains (7)

(Um, don’t be like me… iron your fabric before using it for any project.)

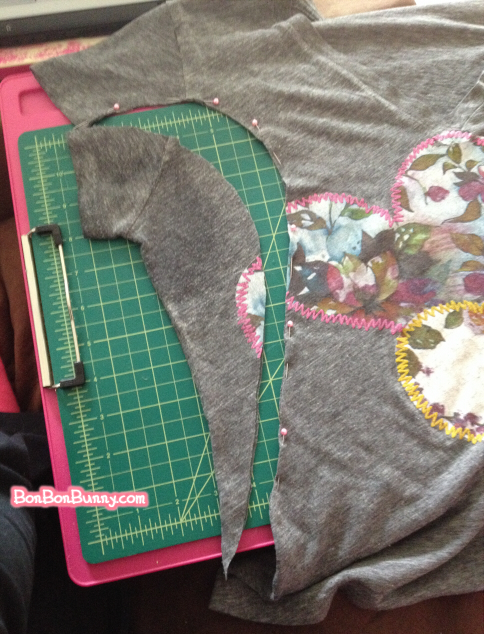
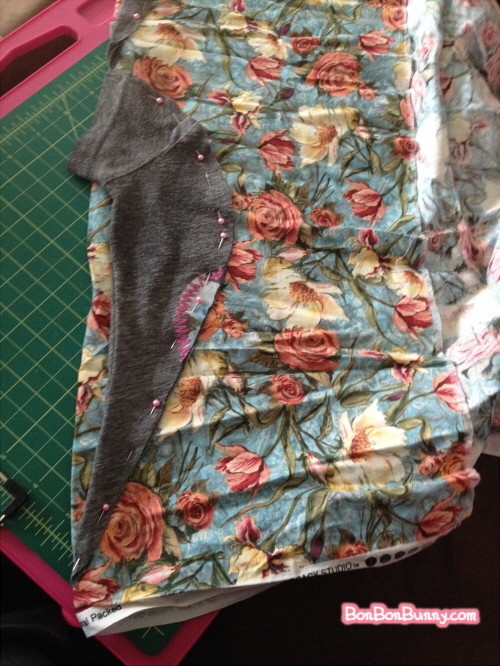
Here, the cut-out pieces are laid over the fabric so that we can trace the same shape.
You want it against a folded edge so that you’re cutting through two layers.
Also, nudge the piece over further to the right than mine appears here.
There shouldn’t be any pieces hanging off the folded edge.

Also, you will only be cutting along the RIGHT side.
The left side (where the fold is) will remain straight.
It looks like excess fabric, but this is
what makes the new shirt slouchy and loose and cozy!

easy tshirt diy slouchy sleeve to repair stains (8)

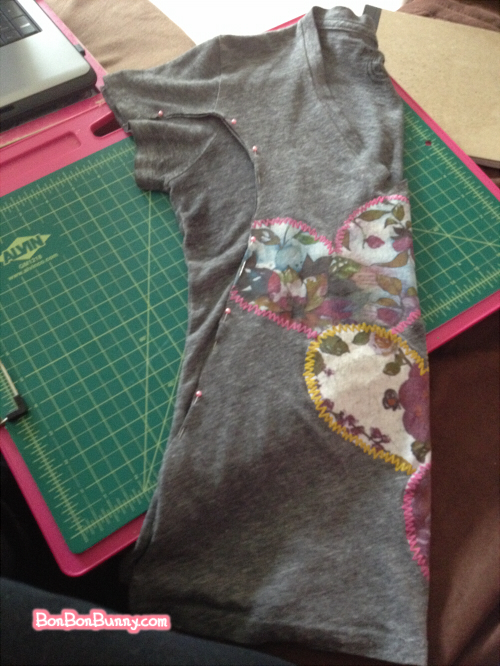
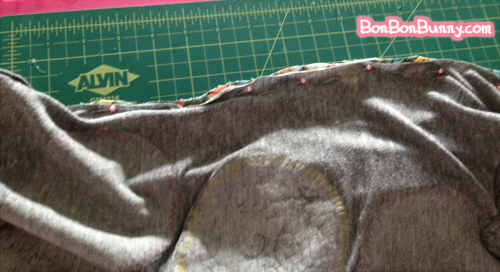
What you can’t see in this picture is all of the pins holding this in place on the inside.
I temporarily pinned it in and turned it right side out for this picture,
to test how it would look and to make sure I cut a correctly-sized piece.

So, this is a rough preview of how it will look when it’s done!

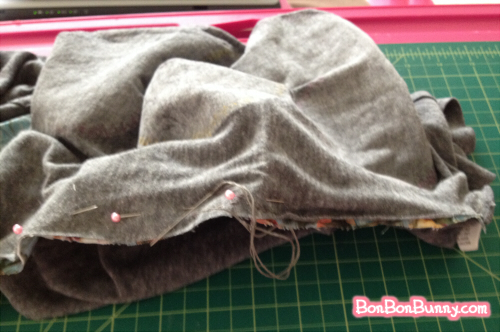
easy tshirt diy slouchy sleeve to repair stains (9)

Here are those pins on the inside.

These photos are a bit old and I am very late in sharing them,
and at the time I did this project I always placed pins in
at a parallel line to the edge… now I place them perpendicularly, lol.

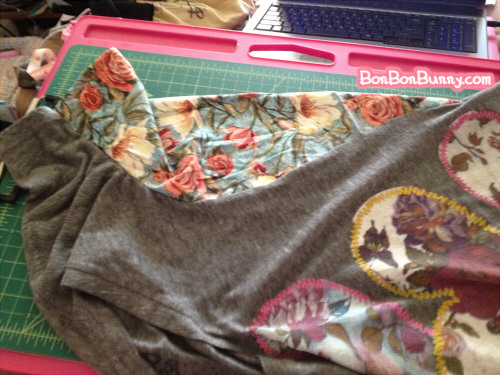
easy tshirt diy slouchy sleeve to repair stains (10)

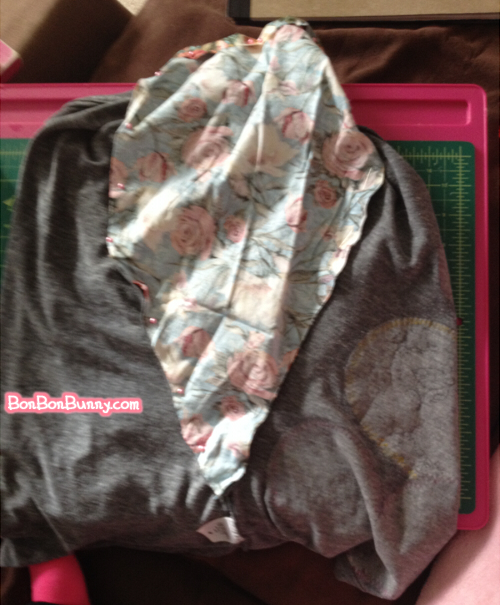
If you open up the shape like this (awkwardly),
you can see how it fits into both the front and back sides of the shirt.

easy tshirt diy slouchy sleeve to repair stains (11)

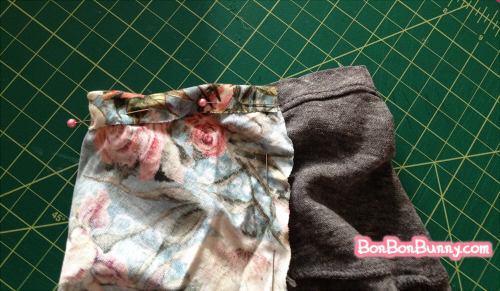
Fold the edge over to line it up with the sleeve.
(Roll it under one more time than this, unlike my photo here that leaves the raw edge out…)

easy tshirt diy slouchy sleeve to repair stains (12)

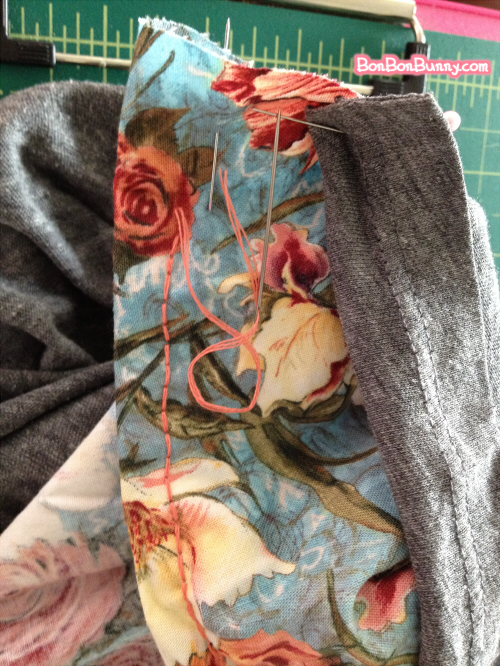
Here’s the other way to tell that this project is old…
BECAUSE I SEWED THIS BY HAND!!
If you love yourself, do this kind of project with a machine.
But, at the same time, the fact that I did it by hand is proof that it can be done.
You CAN do it even if you don’t have access to a machine.
Just be prepared for the hours of involvement
and that you may spend 2 or even 3 days on this…

easy tshirt diy slouchy sleeve to repair stains (13)

The photo above showed me using orange thread,
but that was because the thread would be visible on the outside
and I thought the contrasting orange would be cute on the sleeve~
For the rest, I used grey.  Just backstitch aaaaall the way up and back down.

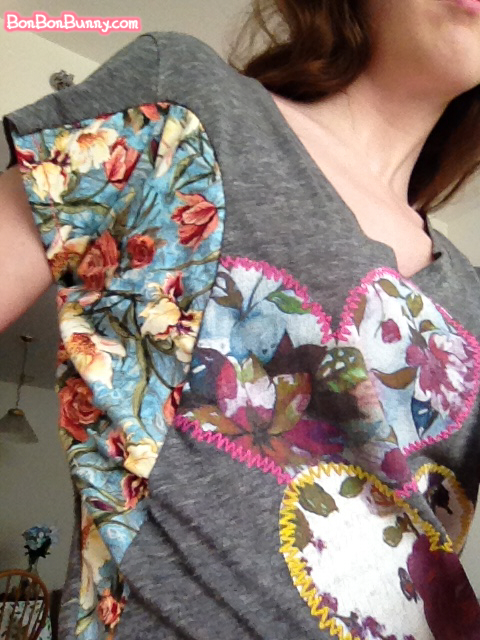
easy tshirt diy slouchy sleeve to repair stains (14)

Here it is flipped right side out again, this time sewn for real!!

easy tshirt diy slouchy sleeve to repair stains (15)

Iron the seam to flatten it neatly, and you are done!!!!
This old favorite t-shirt is repaired and dolled up with extra cuteness,
so I can continue wearing it without shame~

Even with the hand sewing and all of the raw edges that I left,
the shirt is perfectly wearable and can even be safely washed.
Stitches are sturdier than you think!!

It goes to show you that you can be messy and slow in your projects,
and they will still turn out successful.

Sewing is so forgiving and rewarding!!

Gyaru Legwarmers DIY Sewing Tutorial

Saturday, August 29th, 2015

Did you know that it is REALLY HARD to find gyaru sewing tutorials??  I was so surprised that there were so few of them when I searched for them!  I’d really love to be among those putting some out there, because a lot of this is not very difficult to make!

Today I will cover how to make some loose-socks-looking legwarmers!  They will be baggy around your ankles for a cute effect!

I also want to note that I made these some months ago, before I had a sewing machine that I could use regularly. n_n;  Additionally, I made several mistakes – but I will discuss them as we go along, so that you can avoid making them yourself!
gyaru legwarmers sewing tutorial (1)

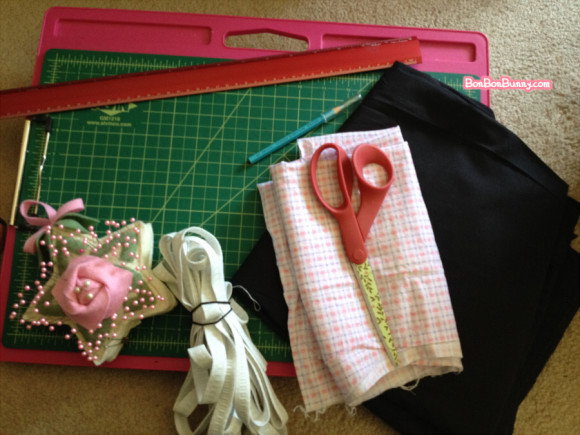
First things first, the materials!
I used solid black as the main fabric, and a pink & purple plaid for contrast.
You’ll also need elastic, either 1/2 inch wide or 3/4 inch wide!

Now, do as I say and not as I do,
and make sure you wash your fabric first, and iron it so that
it is nice and neat while you are working with it. :p
gyaru legwarmers sewing tutorial (2)

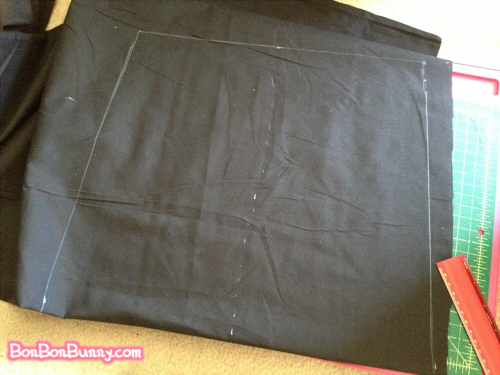
I didn’t make a pattern for this because really, we’re only cutting out rectangles!
I just directly drew out my measurements on the fabric with a marking pencil.
A white colored pencil works fine.

Now, as for how I measured this piece:
Measuring around my lower leg, just under the knee, was 12 inches.
I added just two to that number and cut the top part of our legwarmer shape at 14 inches.
This worked out okaaaay in the end, but I think I should have allowed
more leeway than that.  Maybe add three or four inches to your body measurements
rather than only two!

Anyway, the lower end of the shape will be a little bit wider.
This will make that baggy look at the ankles, like cute loose socks.
I made the bottom of my trapezoid two inches wider than the top, at 16 inches.
But I invite you to do four or five inches more than that,
because in the end I didn’t feel that I had made enough of a difference
between the two measurements. n_n;

Oh yeah: You also want to measure the length of your lower leg,
from knee to ankle in a straight line, for the height of the trapezoid.
Mine for that was 14 inches.
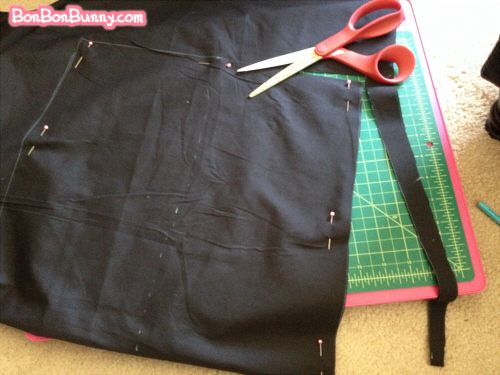
gyaru legwarmers sewing tutorial (3)

To recap, the top width is under your knee + a few inches,
the bottom width is the top measurement + a few more inches,
and the height of the trapezoid is the length from your knee to ankle.

This whole project is not an exact science, so do not worry about being
super precise with your measurements.
Because of the elastic involved in the end, it’s fine if you’re off by
half an inch or whatever.  It’s also fine if you draw or cut messy lines.
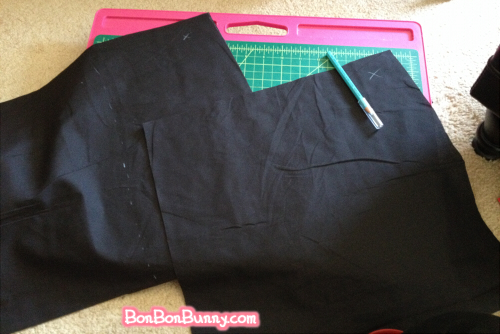
gyaru legwarmers sewing tutorial (4)

Oh yeah, and if you fold your fabric over while cutting, you can cut
both pieces at once!
I put small X’s in the top corners of my pieces so that I would
always know which side of my fabric is the wrong side.

Double-check for that X at the beginning of each step
so that you know you have the wrong side as the inside of the legwarmers!
gyaru legwarmers sewing tutorial (5)

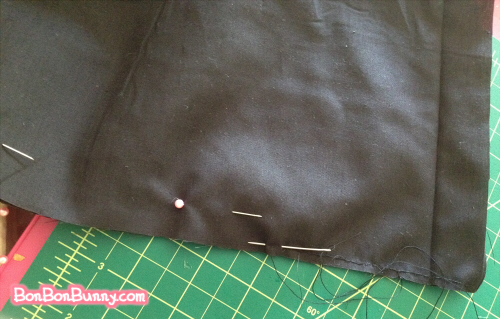
The legwarmer is folded in half long-ways and stitched up~

Don’t make my mistakes.  Don’t sew by hand if you don’t have to.
It will take FOREVS.
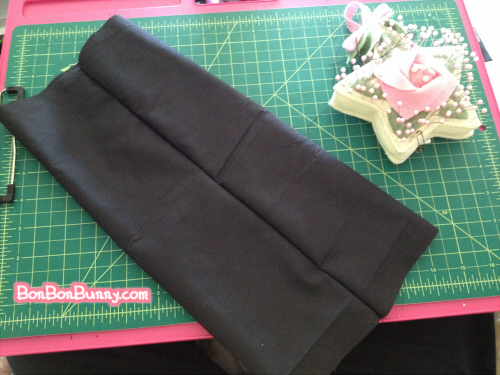
gyaru legwarmers sewing tutorial (6)

One sleeve is done!  Arrange your seam so that it is in the center back.
Also, this is the part where you want to press this seam with an iron.
It will look SO much neater than mine does in this photo lol.

This is also a good point to slip it over your leg and see how it fits!
This is the point where I’d realized mine was a bit more narrow than I wanted,
and I should have made the top width of my trapezoid a bit wider…
But it wasn’t TOO bad, so I kept going!
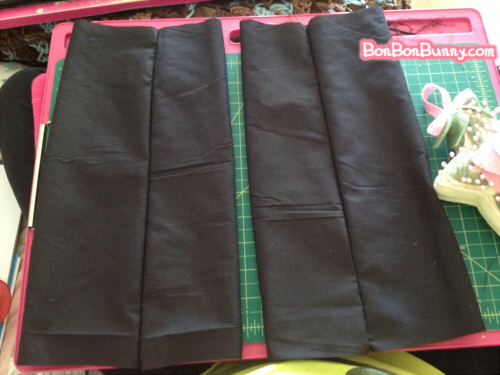
gyaru legwarmers sewing tutorial (7)

now do it AGAIN.

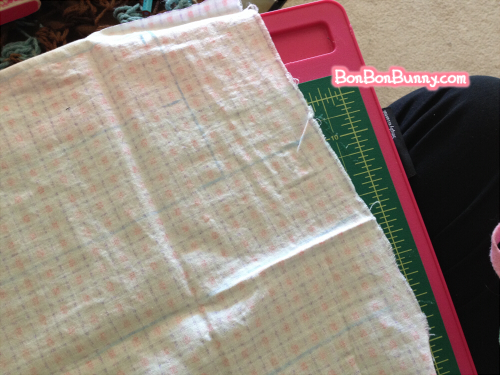
gyaru legwarmers sewing tutorial (8)

Now we are cutting out rectangle strips for the cuffs
at the top and bottom of the legwarmers.
They need to be just over twice the width of your elastic,
and the same length as the top & bottom edges
of the trapezoids that we just finished, plus one inch so that they can overlap slightly
when you sew them together at the back.
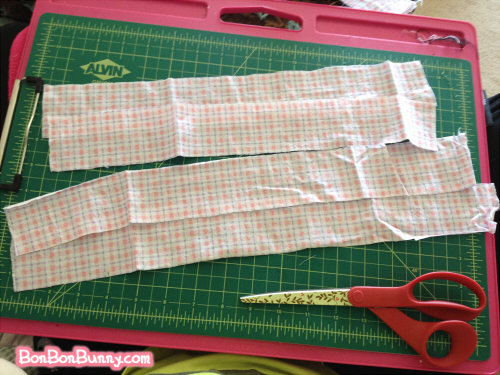
gyaru legwarmers sewing tutorial (9)

I realized that in the other photo my marking pencil’s lines were hard to see,
so here they are again – the light blue markings on the wrong side of the fabric.
We have two shorter strips and two longer strips.
gyaru legwarmers sewing tutorial (10)

Here you can see the two top cuffs and two bottom cuffs much more easily!
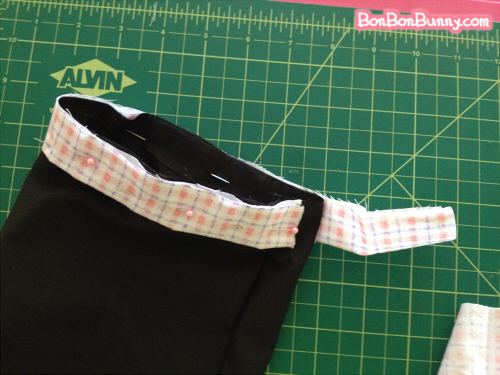
gyaru legwarmers sewing tutorial (11)

The strips are folded in half longwise and pinned along the edge of the legwarmer,
laying flat against it because we’re going to flip it up after it’s sewn together.
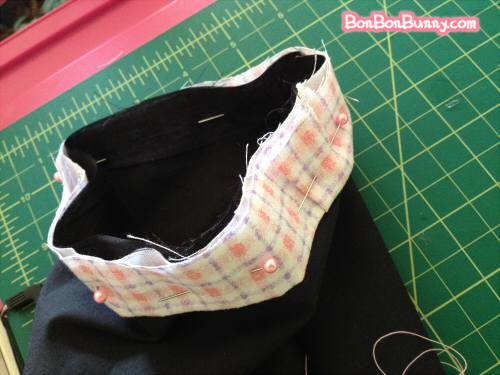
gyaru legwarmers sewing tutorial (13)

This is hard to show, but the seam for the cuff lines up with the seam
for the legwarmer that we sewed earlier.
Overlap the end of the cuff with its other end.
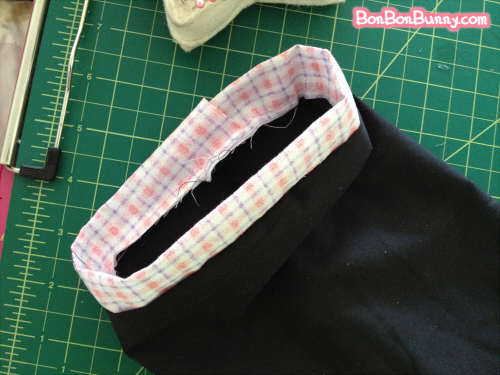
gyaru legwarmers sewing tutorial (14)

After sewing all the way around (but NOT vertically up that overlapped end),
flip the cuff up and it looks like something that is very neatly finished!
(And, sorry that my inner seams are so messy.
If I were sewing with a machine I would turn them inside so that they are neat!)
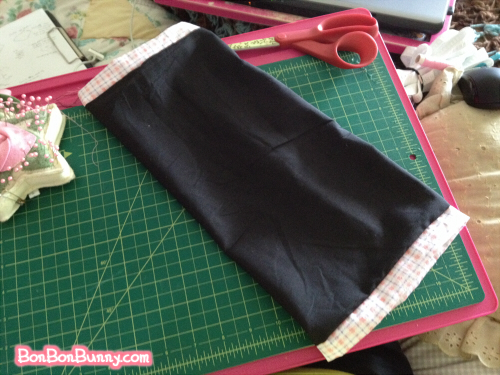
gyaru legwarmers sewing tutorial (15)

Now do that three more times, one for each remaining cuff!
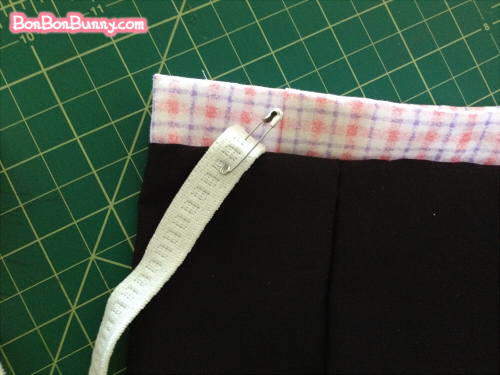
gyaru legwarmers sewing tutorial (16)

Elastic is easier to push through a channel like this if you put
a safety pin on one end!
As for the length of your elastic, subtract two from the measurement
you got when you measured around your lower leg under your knee!
Do the same for the lower cuff, subtracting two
from the measurement around your ankle
!

As you push the elastic through the channel, pin the other end to secure it,
and it will begin to gather a little as you go!
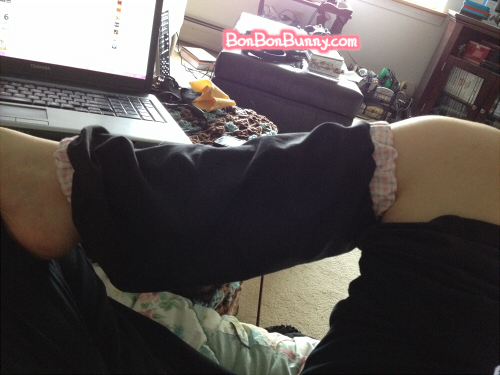
gyaru legwarmers sewing tutorial (17)

Here is how cute it is with elastic in both ends!!
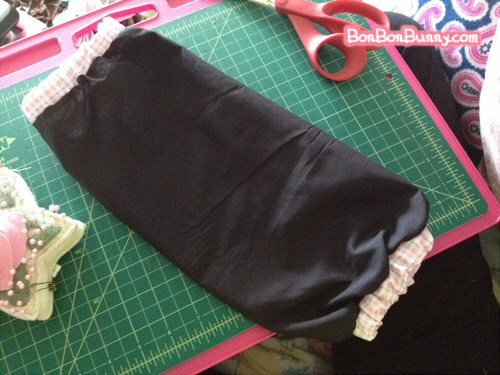
gyaru legwarmers sewing tutorial (18)

Once your elastic is threaded through, overlap both ends of it
and finally make that vertical stitch up the seam in the cuff,
going over it at least three times to secure the elastic inside!
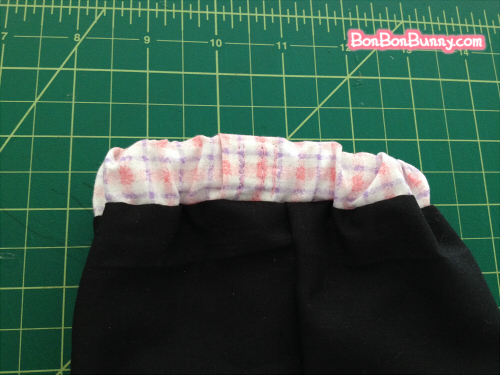
gyaru legwarmers sewing tutorial (19)

It’s a little hard to see, but I made three vertical stitched there
to reeeaaally securely keep the elastic in place –
if you’re doing this by machine it is way easier to sew through the layers!

Technically, the legwarmers are finished at this point!
Try them on to see how they fit!!
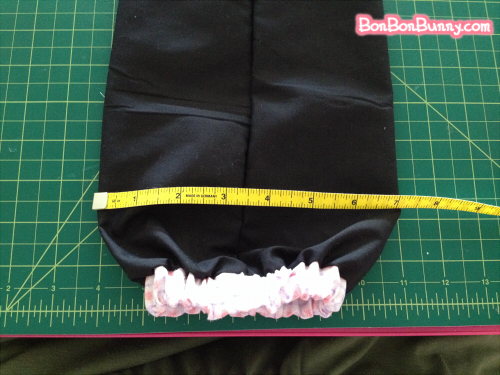
gyaru legwarmers sewing tutorial (20)

I want to add more details, though!!
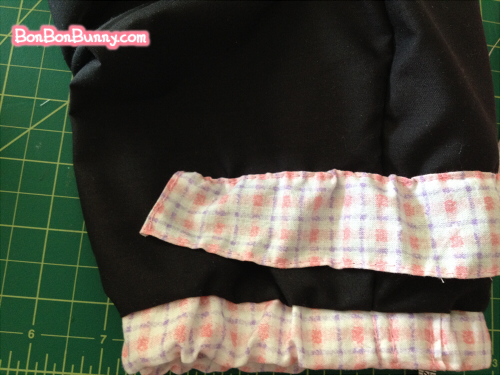
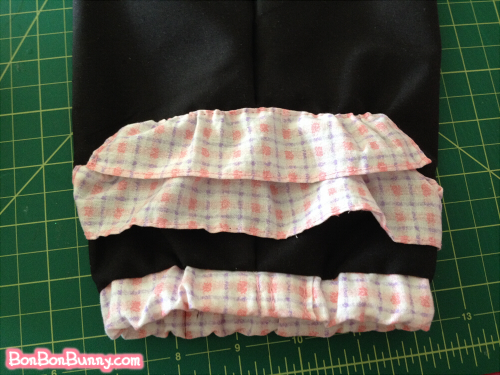
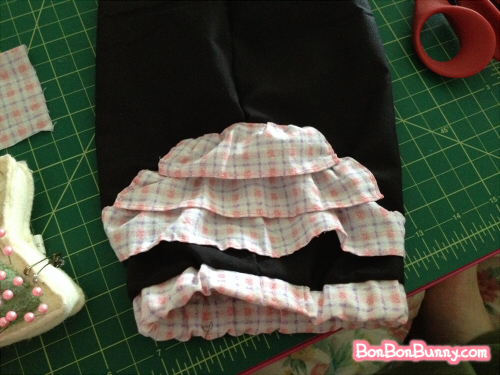
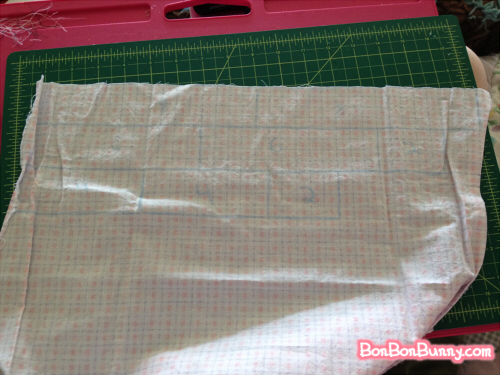
Here is how I made several layers of ruffles along the back.
Laying the legwarmer flat, I measured that it is 7 inches across.
We’ll need strips longer than 7 inches because they are going to be
gathered up to make a ruffle that fits that 7-inch space!
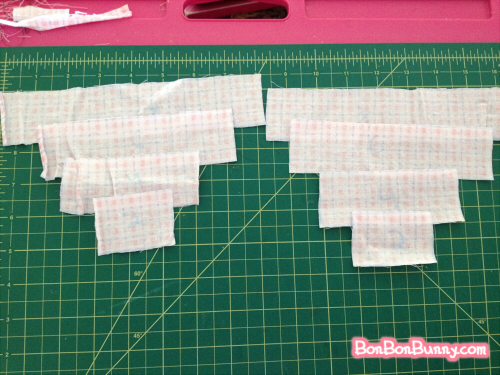
The ruffles will decrease in size as they go up,
so I need several of them, each a bit smaller than the last.
gyaru legwarmers sewing tutorial (21)

Again drawing out my rectangles directly on my fabric lol.
There are two strips in each size – one set for each legwarmer.
gyaru legwarmers sewing tutorial (22)

Here are the strips all cut out!

gyaru legwarmers sewing tutorial (23)

Now I turned the edges down all around to make them look neat and finished.
This step takes FOOOREEEEVERRRRR by hand, don’t do it!
gyaru legwarmers sewing tutorial (24)

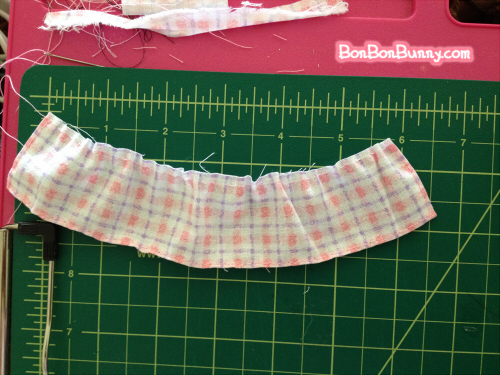
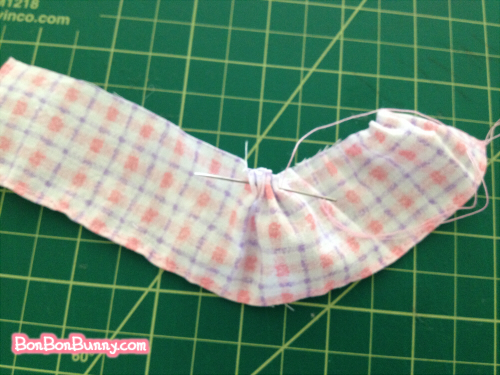
Gathering goes like this!
Run your needle along the top, pinching fabric together through it,
and pull the thread through.
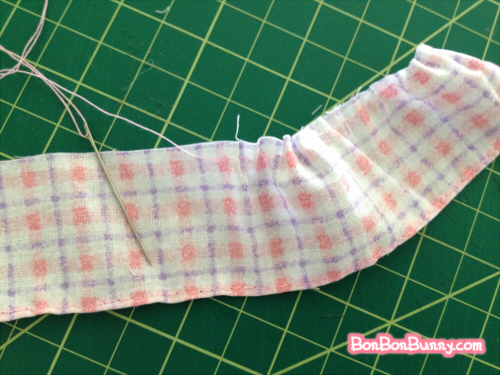
gyaru legwarmers sewing tutorial (25)

Like this.

gyaru legwarmers sewing tutorial (26)

Now I lay the ruffle down against a ruler so that I can fit it to being 6 inches long.
…I was going to go with 7 inches long before (that was the width of the
legwarmer itself laid out flat, remember?)
but when I was looking at it here, my strip was not long enough to look
properly gathered at 7 inches.

Really, when you’re making ruffles, you need to not be like me,
way too stingy with fabric.  Make your strips, like,
twice as wide as the space you want to fill them with.
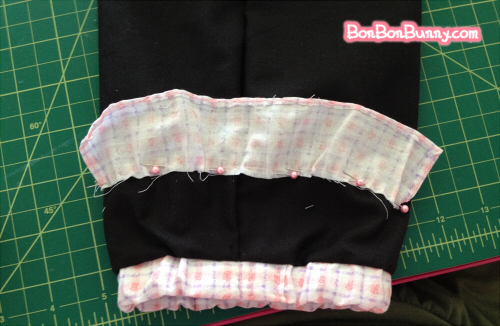
gyaru legwarmers sewing tutorial (27)

Pin along that gathered edge kind of upside-down like this…
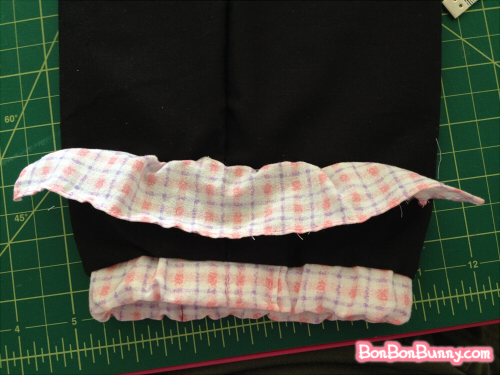
gyaru legwarmers sewing tutorial (28)

…so that when you turn it down, it looks finished like this!
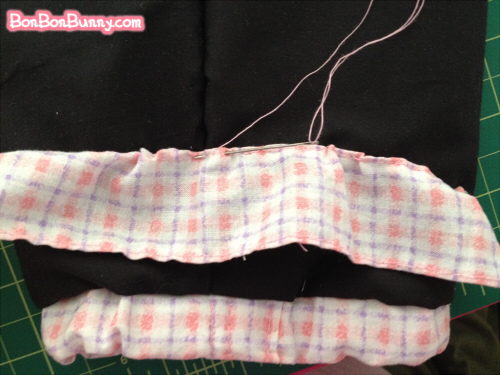
gyaru legwarmers sewing tutorial (29)

sew sew sew

gyaru legwarmers sewing tutorial (30)

I also made vertical stitches along the ends, to hold it down
and also make sure that the ruffle is flaring out diagonally.

Yeah, this would look a lot better if I’d used more fabric for the ruffle!
Make sure that you use it liberally! c:
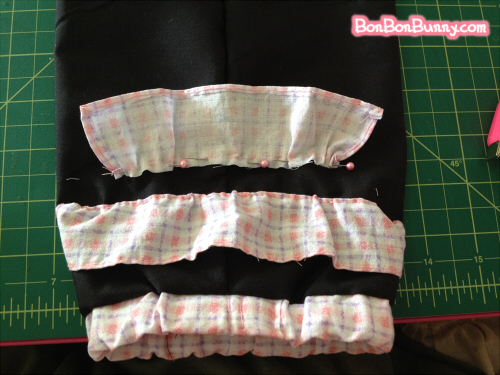
gyaru legwarmers sewing tutorial (31)

Now the next ruffle!

gyaru legwarmers sewing tutorial (32)

Whoa, it’s beginning to come together!
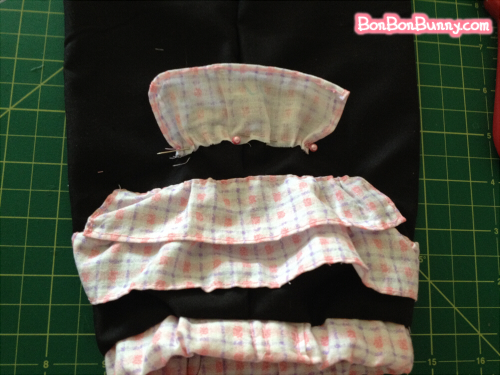
gyaru legwarmers sewing tutorial (33)

Yeah!!

gyaru legwarmers sewing tutorial (34)

Cute!!!

gyaru legwarmers sewing tutorial (35)

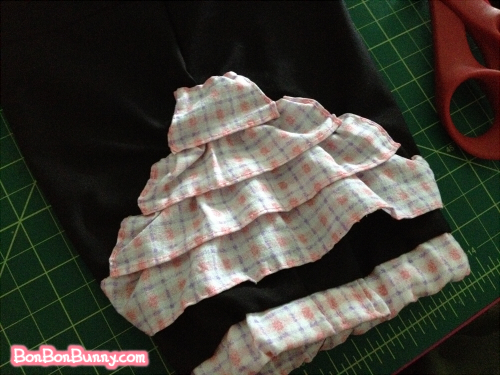
And that’s four!!
I am completely done with the ruffles on one side!!!  WOO!!
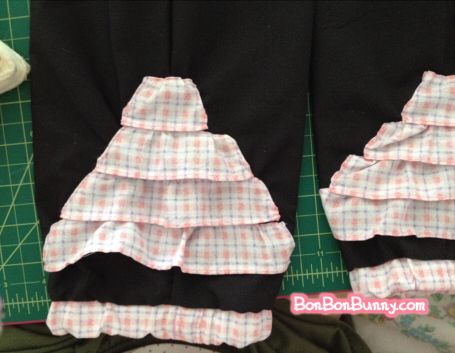
gyaru legwarmers sewing tutorial (36)

Here is the second!!

What you don’t see here is that like a span of a whole day passed
between attaching all of those ruffles to both legwarmer pieces LOL.
This would be done in MINUTES by machine, but oh gosh,
it was so tedious and time-consuming by hand…
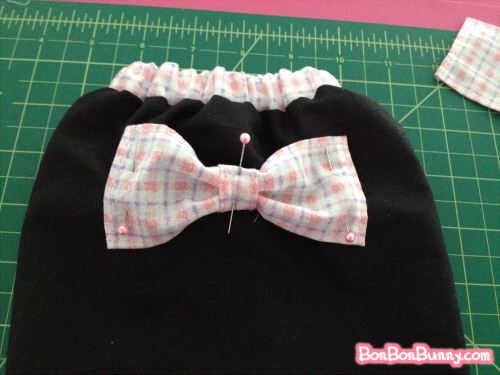
gyaru legwarmers sewing tutorial (37)

I want just one more little detail!!
Little bows at the knee!

Bows are just cut from a rectangle of fabric, then very small strip.
Both pieces have their edges turned under all around, then
the bow is pinned in place.
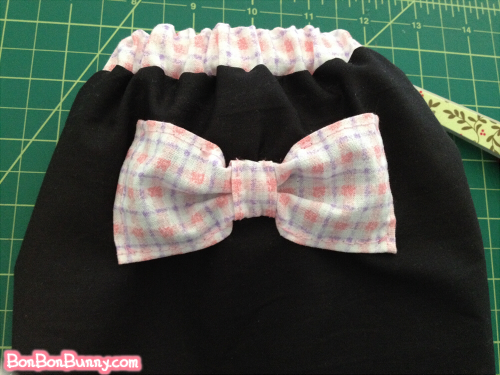
gyaru legwarmers sewing tutorial (38)

…And stitched down in the corners, as well as anchored in the middle.
Definitely one of the easier steps involved haha.

AND!!!  WOW!!!  THAT’S IT!!!
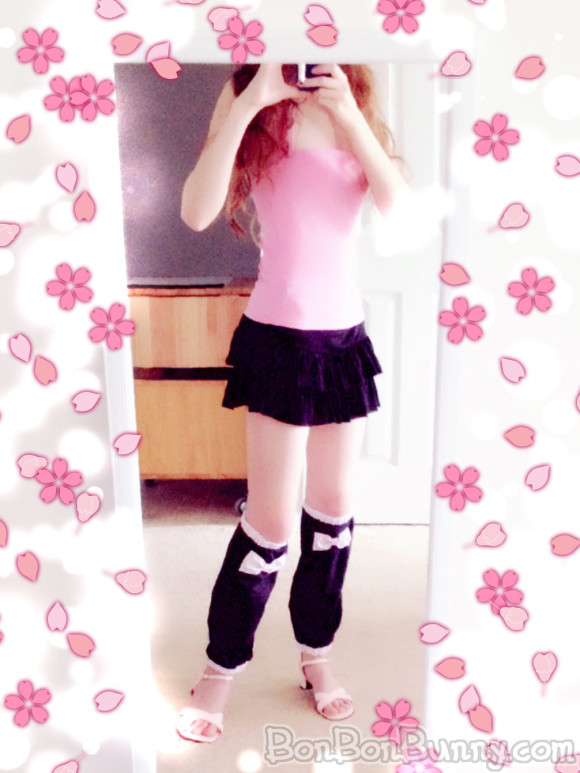
gyaru legwarmers sewing tutorial (39)

gyaru legwarmers sewing tutorial (40)

gyaru legwarmers sewing tutorial (41)

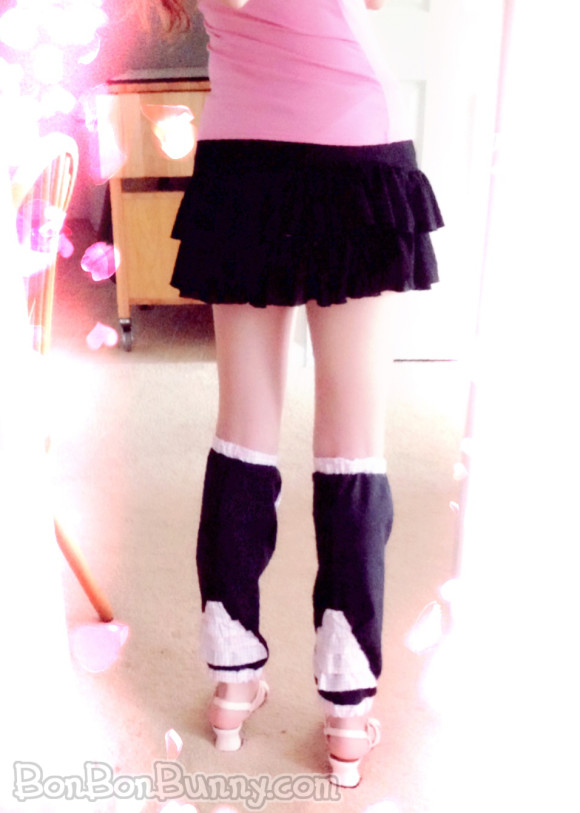
Here they are all finished!!!
Ahhh, I wish that I’d made the ankle width so much wider.
And I wish that I’d made the ruffles so much fuller.

But you know what?  I love them.
They are incredibly super cute and a fantastic accent
to my black/pink outfits!!

When I make more legwarmers in the future,
I know exactly what changes to make to them so that they are perfect!
I can’t wait to make more in more colors!! \(^o^)/
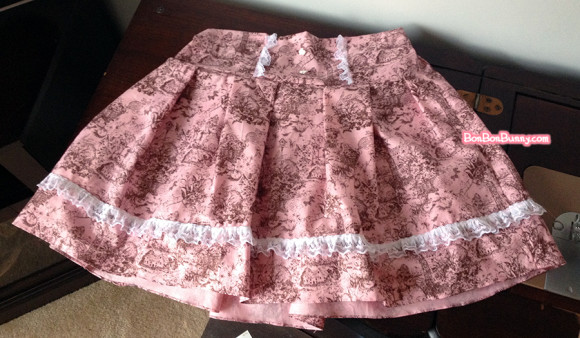
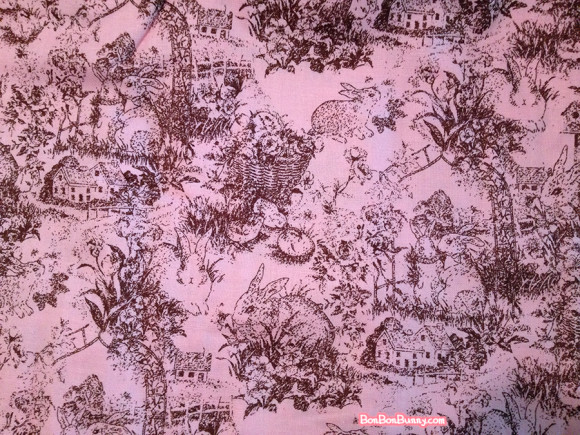
Pink Princess Bunny Plush and Pattern!

Friday, August 21st, 2015

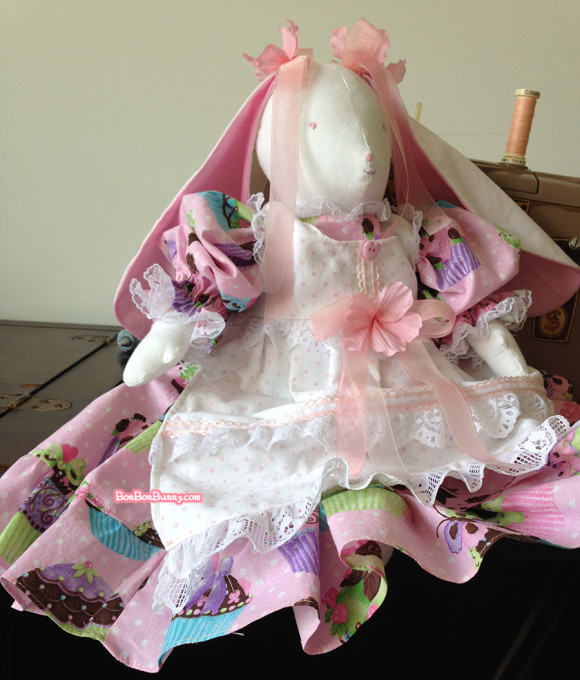
This past week, I sewed a pretty pink princess bunny plush for myself!  I really haven’t made a plush for myself in ages~
She is covered in glittery fabric (the pink inside her ears & the cupcake print for her dress are coated with glitter) and lots of lace, pretty trailing ribbons and pink flowers!

pinkprincessbunny (17)

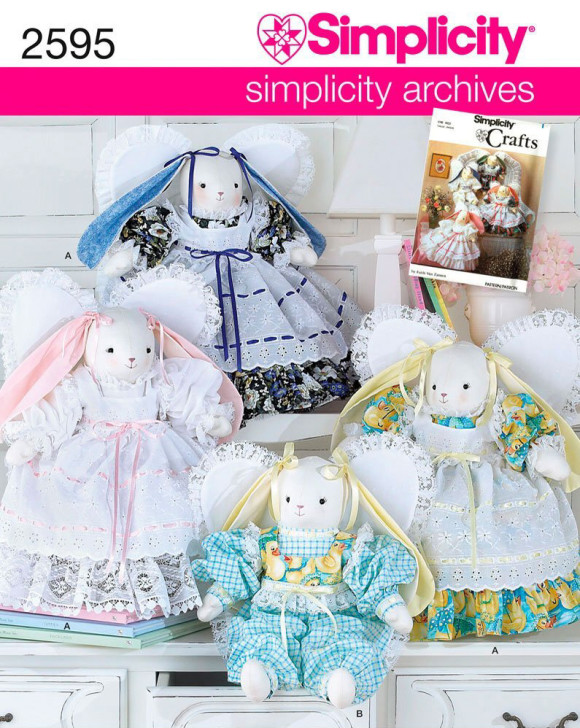
Here is the pattern I followed to make this, a reprint of a vintage sewing pattern!:

simplicity 2595 vintage bunny angel

Simplicity 2595 Vintage Angel Bunny Plush Sewing Pattern

However, I did not follow the last steps of the pattern 100%…
I did my own thing for the bunny’s pinafore rather than using eyelet lace,
and I did not give her angel wings…

Now I shall share some process pics!

pinkprincessbunny (1)

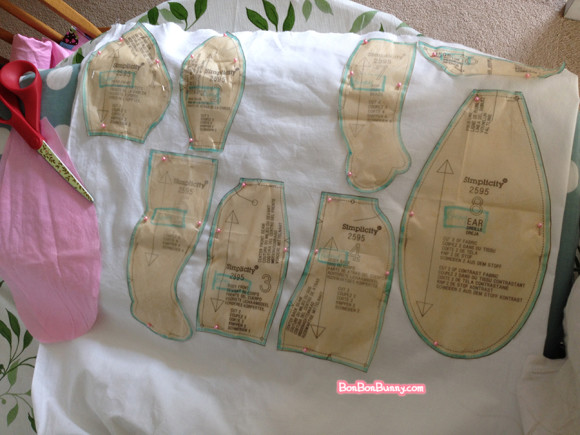
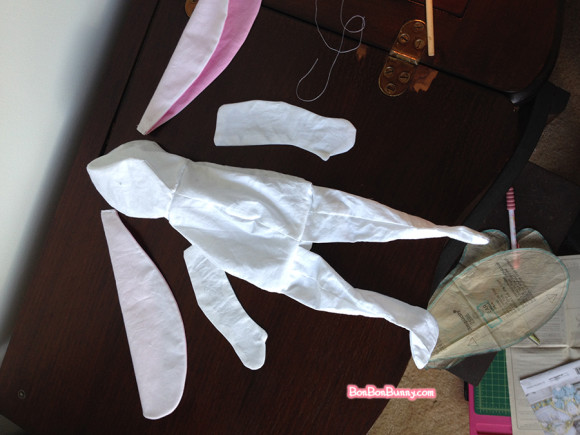
Laying out the pieces and just getting started~
These are all on white fabric, but you can see the pink ear piece
I already cut out on the left

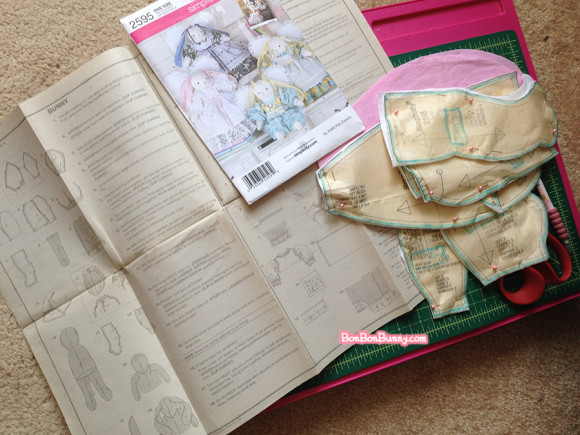
pinkprincessbunny (2)

Getting ready to start sewing is always so exciting!

pinkprincessbunny (5)

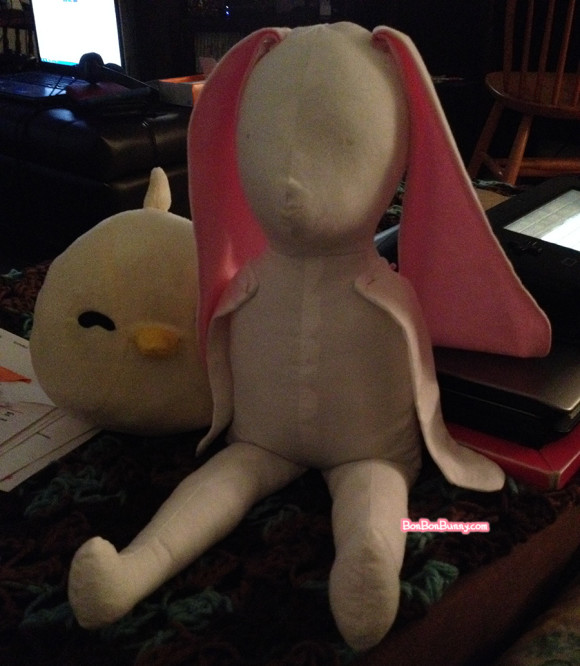
Here is the bunny body mostly sewn up, but not stuffed yet!
LOOK AT THIS DUMB DEFLATED BUNNY I LOVE IT SO MUCH.

pinkprincessbunny (6)

The bunny is looking slightly less dumb but its arms are still unstuffed
and it looks SO DOOFY.  I put extra weight into its butt and feet
with weighted stuffing pellets~
A plush Harvest Moon chick is helping to support it to sit up.

pinkprincessbunny (7)

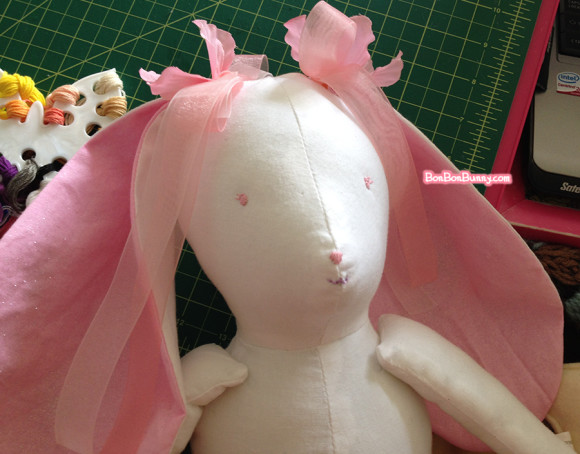
Here is the face embroidered with sweet pink eyes and ribbons and flowers
over her ears!  I think this is the first pic where you can actually tell
that the pink fabric is sparkly.

pinkprincessbunny (9)

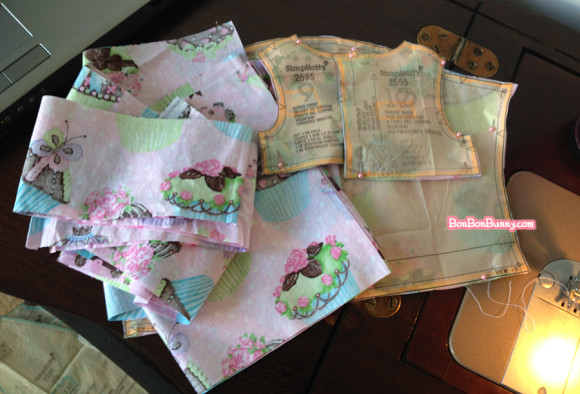
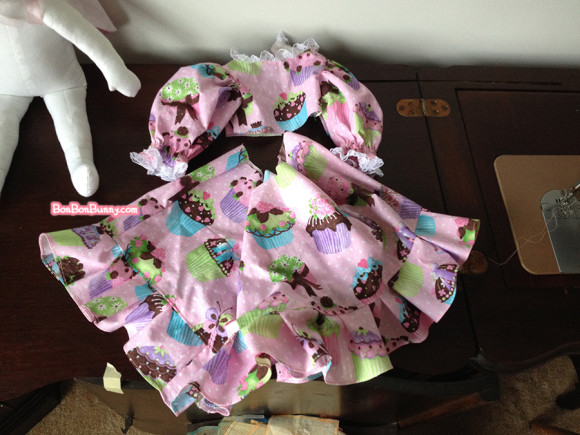
With the bunny’s body done, it’s time to make a cupcake dress!

pinkprincessbunny (11)

There are soooo many small, meticulous stitches required to make clothes for plushes…
making those sleeves was super hard. ; ^;

pinkprincessbunny (12)

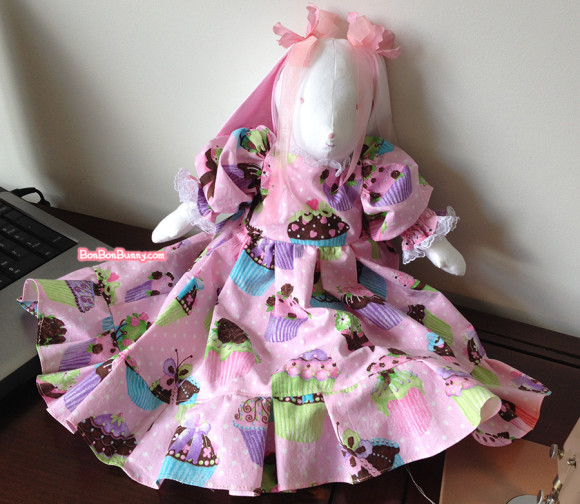
The main dress is finished!  This bunny is a good model.
I also skipped several steps involving making a slip and petticoat netting
for under the dress.  That skirt is sooooo ruffly (it’s only slightly under
the amount of fabric I would use to make a skirt for myself!)
so I did not think the extra volume was needed.

pinkprincessbunny (13)

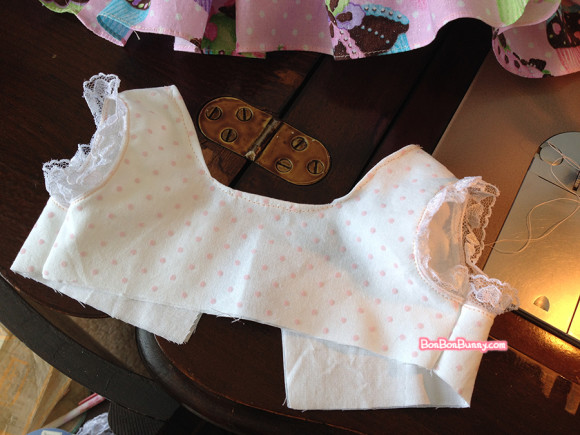
More small, tedious sewing for the bodice of the pinafore.

pinkprincessbunny (14)

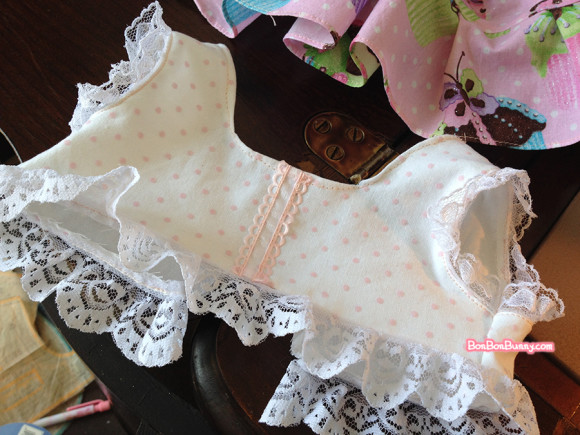
At this point, I started straying from the pattern’s instructions and
started doing my own thing, adding lace and decorations where I liked~

pinkprincessbunny (15)

And she is done!  Manymany hours went into this project,
but I’m so happy to have such a pretty, sparkly bunny princess
who is covered in cupcakes and ribbons and flowers.

pinkprincessbunny (18)

I’m really happy with her!
If I wanted to, I could even make new dresses for her~
But, I think I will take a break from making tiny sleeve stitches for a while!