Super Easy T-Shirt DIY For Slouchy Sleeves (And repair underarm stains)
Here is an incredibly easy way to DIY a t-shirt to add some contrasting color to the sides and make your sleeves slouchier!! It has the added benefit of snipping away that underarm part of the t-shirt that might be damaged or worn-out from sweat or deodorant. You can repair an old favorite t-shirt and make it wearable again!!
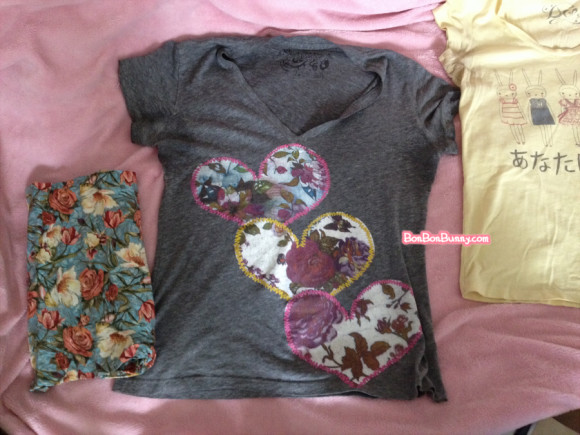
Here is my selected t-shirt: a super comfy and slightly oversized grey heather shirt
with floral hearts that have the appearance of being applique’d on~
Wearing this shirt soooo much has really worn out the underarms…
It’s really embarrassing sharing this photo!! But I am doing so to show you that
you don’t have to be embarrassed either, because this damage is fixable.
The floral fabric on the left is what we’re going to DIY with,
and the yellow shirt on the right is another shirt that I wanted to do
a similar method with, so think of it as a preview for a future post!
–
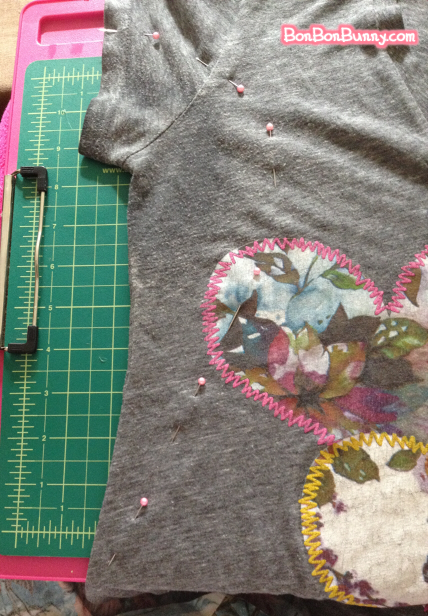
I used pins to mark out the curve I’m going to be cutting along.
There was no super scientific measuring done here –
I only ‘outlined’ the damaged area in a neatly curved way and extended it down.
–
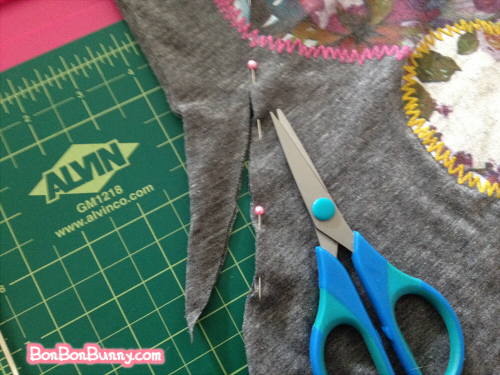
snip snop!
This part is nerve-wracking, because this is the part where you start going,
“Oh my god, I’m cutting into my favorite shirt, what am I doing?!”
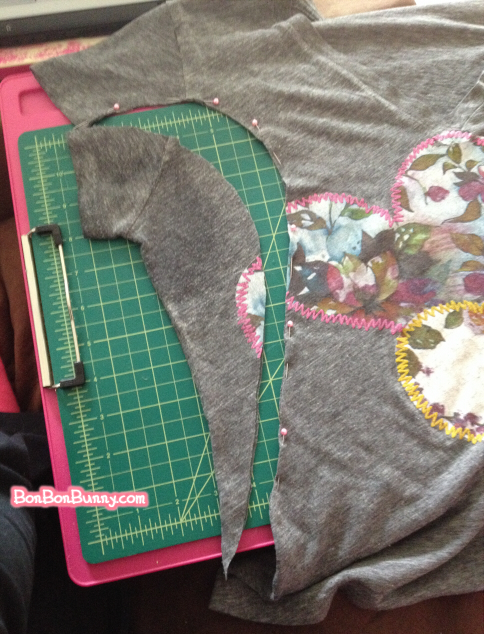
the snip snop has been done.
–
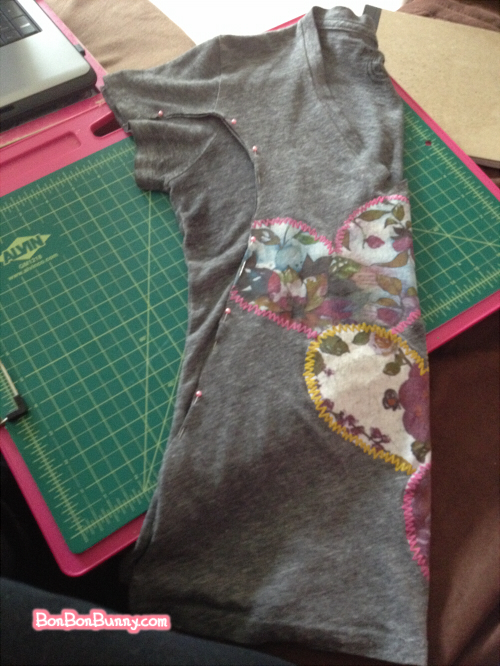
Fold the shirt in half length-wise to cut an identical, symmetrical curve
on the other side.
–
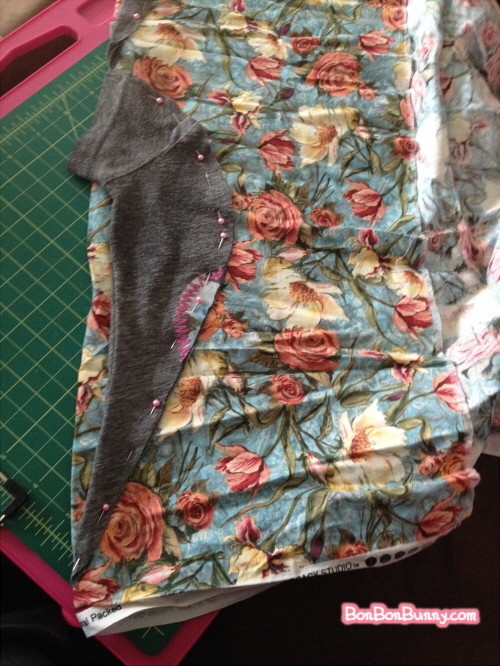
(Um, don’t be like me… iron your fabric before using it for any project.)
Here, the cut-out pieces are laid over the fabric so that we can trace the same shape.
You want it against a folded edge so that you’re cutting through two layers.
Also, nudge the piece over further to the right than mine appears here.
There shouldn’t be any pieces hanging off the folded edge.
Also, you will only be cutting along the RIGHT side.
The left side (where the fold is) will remain straight.
It looks like excess fabric, but this is
what makes the new shirt slouchy and loose and cozy!
–
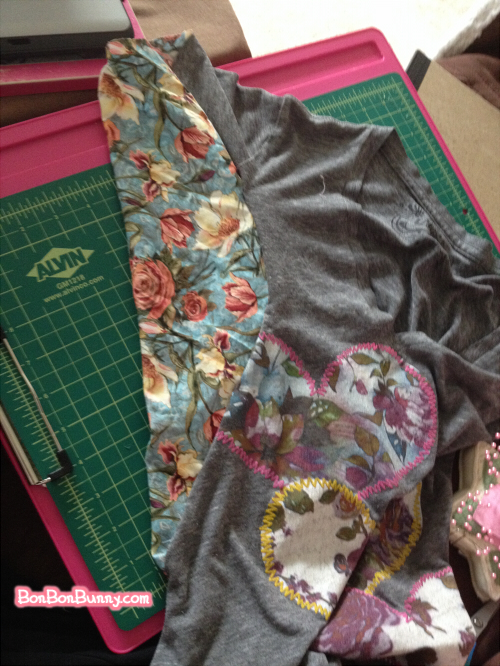
What you can’t see in this picture is all of the pins holding this in place on the inside.
I temporarily pinned it in and turned it right side out for this picture,
to test how it would look and to make sure I cut a correctly-sized piece.
So, this is a rough preview of how it will look when it’s done!
–
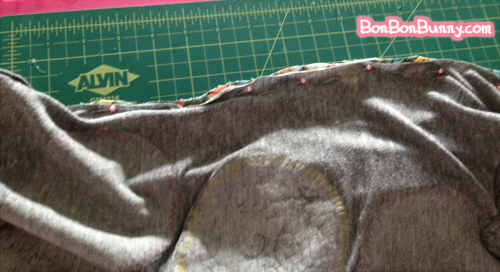
Here are those pins on the inside.
These photos are a bit old and I am very late in sharing them,
and at the time I did this project I always placed pins in
at a parallel line to the edge… now I place them perpendicularly, lol.
–
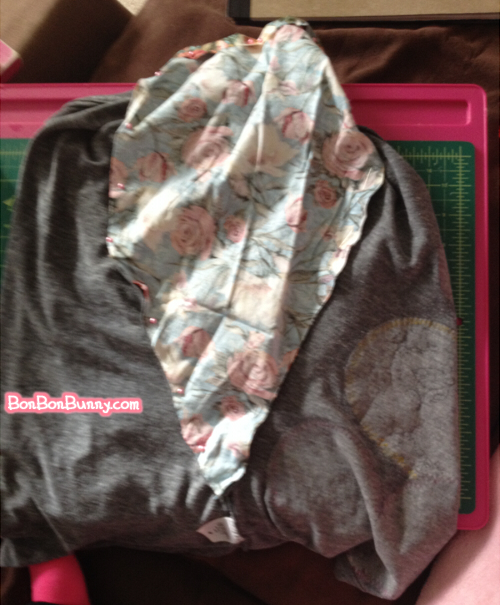
If you open up the shape like this (awkwardly),
you can see how it fits into both the front and back sides of the shirt.
–
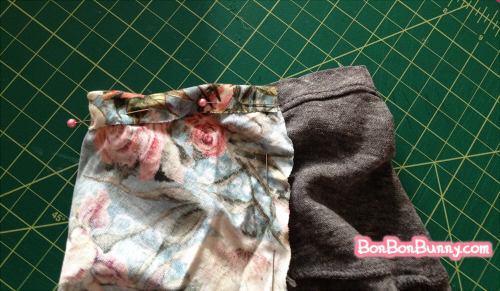
Fold the edge over to line it up with the sleeve.
(Roll it under one more time than this, unlike my photo here that leaves the raw edge out…)
–
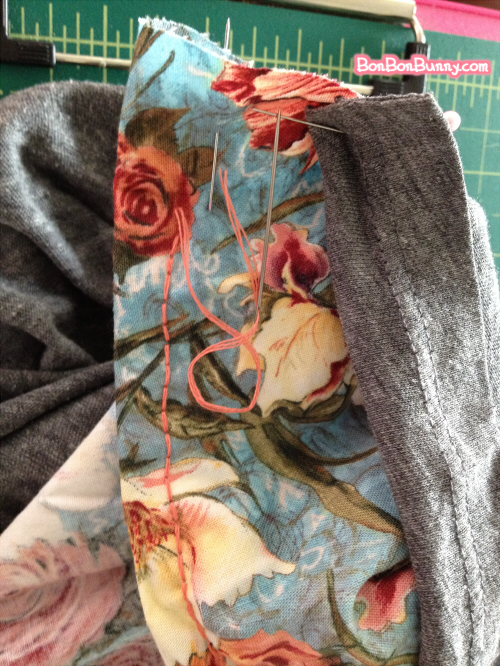
Here’s the other way to tell that this project is old…
BECAUSE I SEWED THIS BY HAND!!
If you love yourself, do this kind of project with a machine.
But, at the same time, the fact that I did it by hand is proof that it can be done.
You CAN do it even if you don’t have access to a machine.
Just be prepared for the hours of involvement
and that you may spend 2 or even 3 days on this…
–
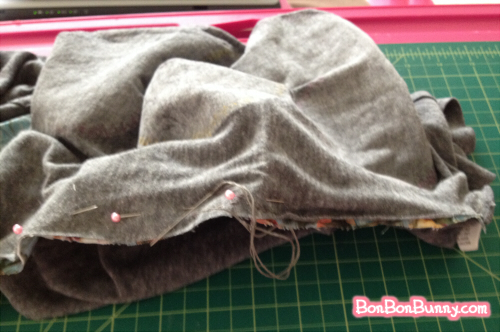
The photo above showed me using orange thread,
but that was because the thread would be visible on the outside
and I thought the contrasting orange would be cute on the sleeve~
For the rest, I used grey. Just backstitch aaaaall the way up and back down.
–
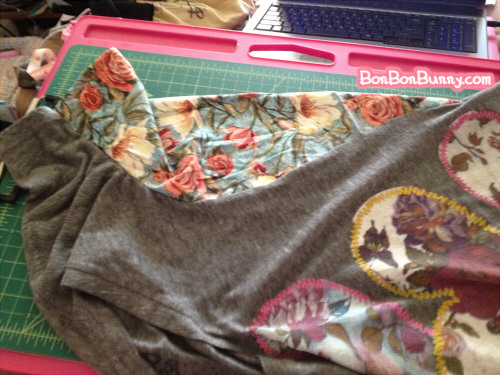
Here it is flipped right side out again, this time sewn for real!!
–
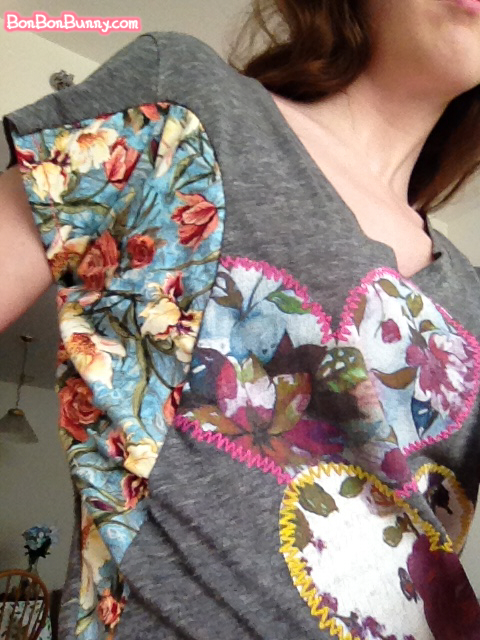
Iron the seam to flatten it neatly, and you are done!!!!
This old favorite t-shirt is repaired and dolled up with extra cuteness,
so I can continue wearing it without shame~
Even with the hand sewing and all of the raw edges that I left,
the shirt is perfectly wearable and can even be safely washed.
Stitches are sturdier than you think!!
It goes to show you that you can be messy and slow in your projects,
and they will still turn out successful.
Sewing is so forgiving and rewarding!!
Monday, October 5th, 2015 3:00 pm
Tags: t-shirt, t-shirt diy.
Subscribe to the comments feed if you like.
You can leave a response, or trackback from your own site.


